

Last time, I wrote a blog post about “IBM watsonx.ai and a simple question-answering pipeline using Python and FastAPI“, and I had an exchange with my family about an OpenAI sample for a FastAPI application, so I created a small FastAPI server to access OpenAI with Python.
This blog post contains the result combined with the GitHub project.
Table of Content
- The Objective
- The simple OpenAI server with FastAPI
- Setup of the Windows Machine
- Setup of the Python environment
- Configure and start the
simple-openai-serverFastAPI server - Get your own OpenAI access
1. The Objective
The objective was to provide three main endpoints:
- One endpoint is to send a simple text to Open AI and return the result.
- One endpoint is to send a preconfigured prompt to Open AI. The preconfigured prompt contains a context and a question as parameters. These parameters will be replaced by the provided values of the endpoint invocation and sent to Open AI. The response is used as the return value of the endpoint.
- One endpoint is to upload a file and question as parameters for Open AI.
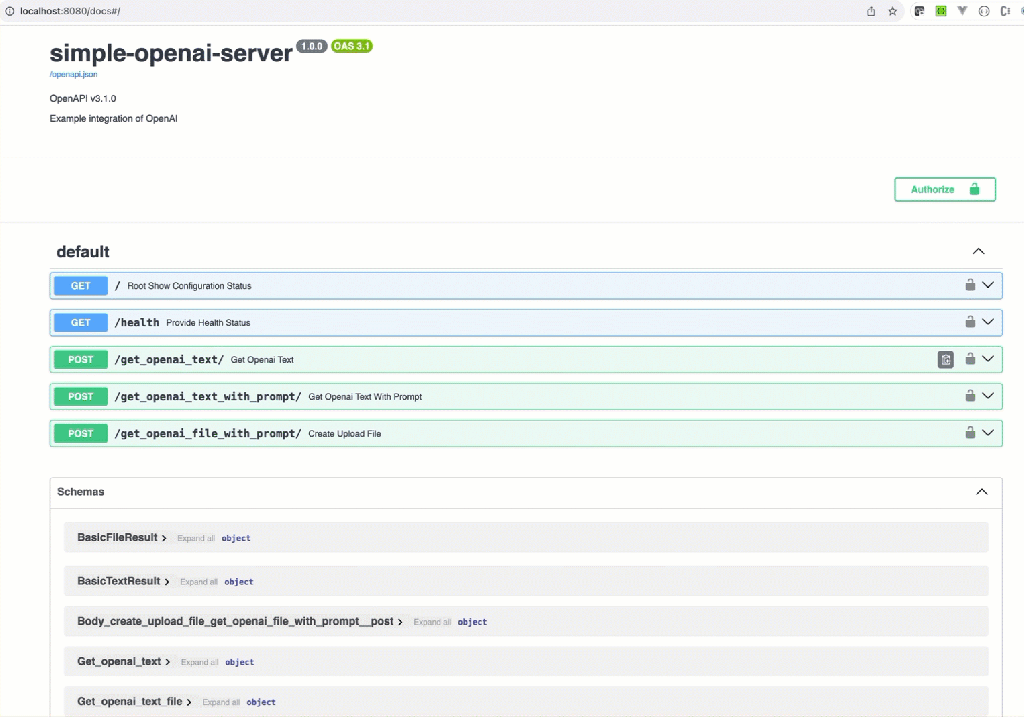
2. The simple OpenAI server with FastAPI
The FastAPI server contains multiple API endpoints for interacting with an OpenAI model.
- … uses
HTTPBasic authenticationfor security. - … defines endpoints for
health status, fetching simple text fromOpenAI, fetching text with a prompt fromOpenAI, and uploading a file as context for the question to get a response fromOpenAI. The code also includesOpenAPIconfiguration for theSwagger UI. - … uses custom modules for environment variables, response and payload definition, and AI access.
- … finally, it runs the FastAPI application using
uvicornon localhost port 8080.
The following gif shows the usage of one endpoint:
You can clone the GitHub project to your local computer and follow the steps to run the example on your local computer.
git clone https://github.com/thomassuedbroecker/simple-openai-server-fastapi.git
Note:
- You can find additional information on how to create a question-answering pipeline in the related project: “How to use and set up
watsonx.aiin the simple pipeline project”: https://github.com/thomassuedbroecker/simple-qa-pipeline. We reuse code and concepts from that question-answering pipeline project in this code example. - You can also use the Online editor (github.dev) to edit files:
https://github.dev/thomassuedbroecker/simple-openai-server-fastapi.
3. Setup of the Windows Machine
3.1 Install Python
Please follow the link for the installation Download Python for Windows.
Note: Additional resources, how to Set virtual environment for Python.
3.2 Install virtual environment
Follow the steps in set up a virtual environment for Python
Note: To add the path variable, open your Windows search bar “Edit environment variables".
3.3 Ensure you can use PowerShell on Windows
Please follow the link for the installation and verification: Learn Microsoft Powershell
3.4 Install VSCode
Please follow the link to install VSCode and visit the VSCode Python Tutorial.
3.5 Install GitBash
Please follow the link for the installation of How to install GitBash
4. Setup of the Python environment
4.1 Create a virtual Python environment
- Windows with GitBash terminal.
cd code python3.10 -m venv env3.10 source ./env3.10/Scripts/activate
- Mac and Linux terminal.
cd code python3.10 -m venv env3.10 source ./env3.10/bin/activate
4.2. Install the needed Python libraries
source ./env3.10/bin/activate
python3 -m pip install --upgrade pip
python3 -m pip install "fastapi[all]"
python3 -m pip install requests
python3 -m pip install pydantic
python3 -m pip install openai
python3 -m pip install typing
python3 -m pip install --upgrade openai
python3 -m pip freeze > requirements.txt
5. Configure and start the simple-openai-server FastAPI server
5.1 Create the environment file
- Set a new user and password.
cat .env_template > .env
- Content
# APP
export APP_USER=admin
export APP_APIKEY=admin
# OpenAI
export OPENAI_KEY=YOUR_KEY
export OPENAI_MODEL=gpt-3.5-turbo-1106
export PROMPT="Document:\n\n<<CONTEXT>>\n\nQuestion:\n\n<<QUESTION>>\n\nAnswer:\n\n"
5.2 Start the simple-openai-server FastAPI server
- Windows
cd code
source ./env3.10/Scripts/activate
source .env
python3 simple-openai-server.py
- Linux 😉
cd code
source ./env3.10/bin/activate
source .env
python3 simple-openai-server.py
5.3 Open a browser and enter the following URL
http://localhost:8080/docs
5.4 Invoke FastAPI server endpoints by using the curl commands
- Access FastAPIserver
/
export URL=http://localhost:8080
curl -X GET "${URL}/" -H "Content-Type: application/json"
- Using REST GET to invoke the
healthendpoint
export URL=http://localhost:8080
export USER=admin
export PASSWORD=thomas
export REST_API_PATH=health
curl -u ${USER}:${PASSWORD} -X GET "${URL}/${REST_API_PATH}"
- Using REST POST to invoke the
get_openai_text_with_promptendpoint.
export URL=http://localhost:8080
export USER=admin
export PASSWORD=thomas
export CONTEXT="My name is Thomas."
export QUESTION="What is my name?"
export REST_API_PATH=get_openai_text_with_prompt
curl -u ${USER}:${PASSWORD} -X POST "${URL}/${REST_API_PATH}/" -H "Content-Type: application/json" -d "{\"context\":\"${CONTEXT}\",\"question\":\"${QUESTION}\"}"
6. Get your own OpenAI access
6.1 Register your account
Note: OpenAI has a prepaid model because you need to pay 5 $ a minimum for the usage, and during my last example creation and livestream, I had to pay nothing for watsonx.ai, because you had a free trial at the beginning. You can find more details on the IBM watsonx pricing page.
7. Additional notes
I hope this was useful to you, and let’s see what’s next?
Greetings,
Thomas
#python, #fastapi, #openai, #swagger, #ai, #prompt, #curl, #bash

Leave a comment