

There are several frameworks to build microservices applications, for example, Microprofile and Spring Boot. This blog post is a customized extract of the “Spring Boot Quickstart” in February 2024 to start a Spring Boot Java application using Maven, Swagger UI, an initial basic auth with standard configuration, and using only standard configurations to avoid source code changes.
- Create a “Hello World” WebService
- Add a Swagger UI server
- Add initial basic authentication
- Additional resources
1. Create a WebService
In this section, we just get the simple WebService running with minimal code changes in the code generated by the Spring initialzr.
1.1. Start with Spring Boot Quickstart to generate your first project.
With the Spring initialzr you can easily configure your starting point for your Spring Boot application and download the code as a zip file.

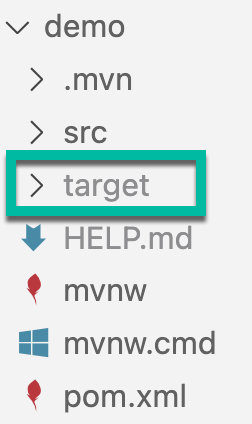
The image below shows the folder structure of the generated code. You can add this code to your GitHub project.

1.2. (Optional) Setup the VS Code Java environment
These links to VS Code extensions may be helpful when using VS Code for your Java development environment.
- Install the Extension Pack for Java for VS Code
- Install the Spring Boot Extension Pack for VS Code
1.3. Update the generated code in the DemoApplication.java file
- Change the source code from the source code below:
package com.example.demo;

import org.springframework.boot.SpringApplication;
import org.springframework.boot.autoconfigure.SpringBootApplication;

@SpringBootApplication
public class DemoApplication {

	public static void main(String[] args) {
		SpringApplication.run(DemoApplication.class, args);
	}

}
- To the following code:
package com.example.demo;
import org.springframework.boot.SpringApplication;
import org.springframework.boot.autoconfigure.SpringBootApplication;
import org.springframework.web.bind.annotation.GetMapping;
import org.springframework.web.bind.annotation.RequestParam;
import org.springframework.web.bind.annotation.RestController;

@SpringBootApplication
@RestController
public class DemoApplication {
    public static void main(String[] args) {
      SpringApplication.run(DemoApplication.class, args);
    }

    @GetMapping("/hello")
    public String hello(@RequestParam(value = "name", defaultValue = "World") String name) {
      return String.format("Hello %s!", name);
    }
}
1.4. Use Maven to run your application
1.4.1. Verify you have installed Maven. Here is the Official Apache Maven documentation.
- Run the mvn –version
mvn --version
#Optional: brew info maven
- Example output:
Apache Maven 3.9.6 (bc0240f3c744dd6b6ec2920b3cd08dcc295161ae)
Maven home: /usr/local/Cellar/maven/3.9.6/libexec
Java version: 18, vendor: Oracle Corporation, runtime: /Library/Java/JavaVirtualMachines/jdk-18.jdk/Contents/Home
Default locale: en_GB, platform encoding: UTF-8
OS name: "mac os x", version: "14.2.1", arch: "x86_64", family: "mac"
1.4.2 Verify the create pom.xml file
<?xml version="1.0" encoding="UTF-8"?>
<project xmlns="http://maven.apache.org/POM/4.0.0" xmlns:xsi="http://www.w3.org/2001/XMLSchema-instance"
	xsi:schemaLocation="http://maven.apache.org/POM/4.0.0 https://maven.apache.org/xsd/maven-4.0.0.xsd">
	<modelVersion>4.0.0</modelVersion>
	<parent>
		<groupId>org.springframework.boot</groupId>
		<artifactId>spring-boot-starter-parent</artifactId>
		<version>3.2.3</version>
		<relativePath/> <!-- lookup parent from repository -->
	</parent>
	<groupId>com.example</groupId>
	<artifactId>demo</artifactId>
	<version>0.0.1-SNAPSHOT</version>
	<packaging>war</packaging>
	<name>demo</name>
	<description>Demo project for Spring Boot</description>
	<properties>
		<java.version>17</java.version>
	</properties>
	<dependencies>
		<dependency>
			<groupId>org.springframework.boot</groupId>
			<artifactId>spring-boot-starter-web</artifactId>
		</dependency>

		<dependency>
			<groupId>org.springframework.boot</groupId>
			<artifactId>spring-boot-starter-tomcat</artifactId>
			<scope>provided</scope>
		</dependency>
		<dependency>
			<groupId>org.springframework.boot</groupId>
			<artifactId>spring-boot-starter-test</artifactId>
			<scope>test</scope>
		</dependency>
	</dependencies>

	<build>
		<plugins>
			<plugin>
				<groupId>org.springframework.boot</groupId>
				<artifactId>spring-boot-maven-plugin</artifactId>
			</plugin>
		</plugins>
	</build>

</project>
4.2. Build the application
- Run the
mvn packagecommand to package the example application
mvn package
- Output
This command creates a new folder called target.
[INFO] ------------------------------------------------------------------------
[INFO] BUILD SUCCESS
[INFO] ------------------------------------------------------------------------
[INFO] Total time:  14.889 s
[INFO] Finished at: 2024-02-23T19:58:13+01:00
[INFO] ------------------------------------------------------------------------
1.4.3 Run the application
For more details, you can visit the Spring Boot documentation.
- Run the
Spring Bootapplication run command
mvn spring-boot:run
# mvn spring-boot:run -Dspring-boot.run.jvmArguments="-Xdebug -Xrunjdwp:transport=dt_socket,server=y,suspend=y,address=5005"
- Example output:
  .   ____          _            __ _ _
 /\\ / ___'_ __ _ _(_)_ __  __ _ \ \ \ \
( ( )\___ | '_ | '_| | '_ \/ _` | \ \ \ \
 \\/  ___)| |_)| | | | | || (_| |  ) ) ) )
  '  |____| .__|_| |_|_| |_\__, | / / / /
 =========|_|==============|___/=/_/_/_/
 :: Spring Boot ::                (v3.2.3)

2024-02-23T20:21:58.715+01:00  INFO 26212 --- [           main] com.example.demo.DemoApplication         : Starting DemoApplication using Java 18 with PID 26212 (/Users/thomassuedbroecker/Downloads/dev/verify_spring_boot/demo/target/classes started by thomassuedbroecker in /Users/thomassuedbroecker/Downloads/dev/verify_spring_boot/demo)
2024-02-23T20:21:58.718+01:00  INFO 26212 --- [           main] com.example.demo.DemoApplication         : No active profile set, falling back to 1 default profile: "default"
2024-02-23T20:21:59.237+01:00  INFO 26212 --- [           main] o.s.b.w.embedded.tomcat.TomcatWebServer  : Tomcat initialized with port 8080 (http)
2024-02-23T20:21:59.246+01:00  INFO 26212 --- [           main] o.apache.catalina.core.StandardService   : Starting service [Tomcat]
- Invoke the application
curl http://localhost:8080/hello
- Example output:
Hello World!
2. Add Swagger UI server and do an initial configuration
2.1 Add a Swagger UI server
To add a Swagger UI server, you only need to add springdoc-openapi to your POM file.
		<!-- https://mvnrepository.com/artifact/org.springdoc/springdoc-openapi-starter-webmvc-ui -->
		<dependency>
			<groupId>org.springdoc</groupId>
			<artifactId>springdoc-openapi-starter-webmvc-ui</artifactId>
			<version>2.3.0</version>
		</dependency>
2.2. Fast initial configuration
To do an fast initial configuration you can use the /resources/application.properties file.
#Swagger
springdoc.swagger-ui.tryItOutEnabled=true
springdoc.swagger-ui.operationsSorter=method
springdoc.swagger-ui.tagsSorter=alpha
springdoc.swagger-ui.filter=true
2.3. Fast initial configuration
Run the application again visit the following url:
open http://localhost:8080/swagger-ui/index.html
The image below show the Swagger UI you can access:

3. Add basic security to the application
3.1 Add an initial basic authentication
With this configuration you will get a password in the terminal and you can choose a username.
		<!-- https://mvnrepository.com/artifact/org.springframework.boot/spring-boot-starter-security -->
		<dependency>
			<groupId>org.springframework.boot</groupId>
			<artifactId>spring-boot-starter-security</artifactId>
			<version>3.2.3</version>
		</dependency>
3.2 Configure the initial basic authentication
To do an fast initial configuration you can use the /resources/application.properties file, to use you custom password and user.
#Security
spring.security.user.password=admin
spring.security.user.name=admin
spring.security.user.roles=ADMIN
3.2 Start the application again and visit Swagger UI
Now you can log on with your defined user and password.

4. Additional resources
These are some additional resources that may be useful to you.
- Official Apache Maven documentation
- Spring Boot Maven Plugin Reference Guide
- Guide to your first Spring-Boot web application
- Spring.io Guide Rest
- Handling URL Encoded Form Authentication
- Read from a file
- Guide a Spring Boot Session
I hope this was useful to you and let’s see what’s next?
Greetings,
Thomas
#springboot, #java, #rest, #basicauthentication, #swaggerui
