An Example of how use the “Bee Agent Framework” (v0.0.33) with watsonx.ai

In my last blog post on example weather agents and using models running in watsonx.ai, I used LangChain to check out how the integration with watsonx.ai works.

Now, I wanted to try the new Bee Agent Framework with watsonx.ai.

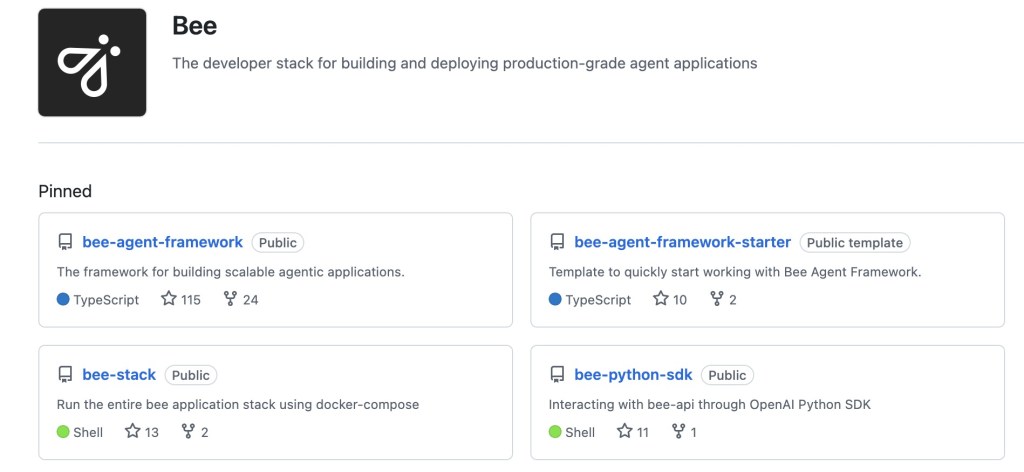
The Be Agent Framework is a part of the Bee project on GitHub:
The developer stack for building and deploying production-grade agent applications
The image below is a screenshot created on the 23.10.2024 from the project and shows the main repositories of the project.

Be Agent Framework: “The Bee Agent Framework makes it easy to build scalable agent-based workflows with your model of choice. The framework is been designed to perform robustly with IBM Granite and Llama 3.x models, and we’re actively working on optimizing its performance with other popular LLMs.”

While searching for the watsonx example, I found this useful blog post by Niklas Heidloff “Simple Bee Agent Framework Example”.

When I started to reproduce the example, I ran into the situation where the Bee Agent Framework had been updated and changed, and the code didn’t work as expected.

This blog post contains a guide to running the weather agent example on the local MacOS machine in v0.0.33.

This blog post uses the information from Niklas Heidloff, the updated PromptTemplate instance creation information from the Issue in “Bee Agent Framework” and the Bee Agent Framework Starter.

The execution output of this example illustrates how the agent retrieves current weather data for Las Vegas. The following GIF shows an execution of the weather agent example.

The Bee Agent Framework uses mainly TypeScript for its implementation.

So you need to install:

Here is my example implementation on a GitHub repository bee-agent-based-on-starter-template.

The blog post is structured in:

  1. Setup
    1. Install Node.js
    2. 1.2 Restart terminal and install Node Version Manager (nvm)
    3. 1.2 Install TypeScript
    4. 1.3 Install Ollama
    5. 1.4 Install Yarn
  2. The setup the Be Agent Framework Project
    1. Start with a new bee agent project using the starter template provided by the Bee Frame Work
    2. Configure the watsonx.ai relevant environment variables in the .env file
    3. Copy the helper files into your project.
    4. Copy following example code into your project
  3. Run the example
    1. Execution
    2. Output
  4. Resources
  5. Summary

1. Setup

1.1 Install Node.js

curl -o- https://raw.githubusercontent.com/nvm-sh/nvm/v0.40.0/install.sh | bash
  • Inspect the .zshrc configuration
cat /Users/[USER]/.zshrc
# Created by `pipx` on 2024-04-15 12:44:54
export PATH="$PATH:/Users/[USER]/.local/bin"
export PATH="/opt/homebrew/opt/libpq/bin:$PATH"
. ~/.ilab-complete.zsh
​
export NVM_DIR="$HOME/.nvm"
[ -s "$NVM_DIR/nvm.sh" ] && \. "$NVM_DIR/nvm.sh"  # This loads nvm
[ -s "$NVM_DIR/bash_completion" ] && \. "$NVM_DIR/bash_completion"  # This loads nvm bash_completion

_Note:_ Maybe you need to execute in addition following command.

cudo chown -R 501:20 "/Users/[USER]/.npm"

1.2 Restart terminal and install Node Version Manager (nvm)

The following installation ensures you install a specific version of Node Version Manager (nvm), and you can also use the nvm install.

nvm install 20
  • Verify the installation
    • Node: v20.18.0
    • npm: 10.8.2
npm -v
node -v

1.2 Install TypeScript

You don’t need to install TypeScript globally, but we do it in this case.

sudo npm install typescript -g
sudo npm i tsx -g
sudo npm i typescript-rest-swagger -g

1.3 Install Ollama

Download and install.

1.4 Install Yarn

corepack enable
yarn install

2. The setup the Be Agent Framework Project

This example was tested with the version v0.0.33 of the framework.

2.1 Start with a new bee agent project using the starter template provided by the Bee Framework

Create your own instance using the Bee Agent Framework Starter project as a GitHub template to create your repository.

  1. Follow the link and create a repository create a repository
  2. Clone newly created repository to your local computer

Here is my GitHub project for this example: bee-agent-based-on-starter-template.

2.2 Configure the watsonx.ai relevant environment variables in the .env file

Create a new .env file from the .env_template in the project and edit the .env file in the project to use the model running on watsonx.ai.

## WatsonX
export WATSONX_BASE_URL=https://eu-de.ml.cloud.ibm.com
export WATSONX_PROJECT_ID="XXX"
export WATSONX_API_KEY="XXXX"
export WATSONX_MODEL="meta-llama/llama-3-1-70b-instruct"

2.3 Copy the helper files into your project.

In the Bee Agent Framework under examples you can find two helpers these helpers are io.ts and setup.ts.

Download the files or create new files in the newly create repository into the folder src/helpers.

2.4 Copy following example code into your project

The following code contains an important update for the PromptTemplate because the following code does no longer work:

const template = new PromptTemplate({
  variables: ["messages"], 

The code implements following:

  1. The definition of a chat prompt template.
  2. The integration to watsonx is set up.
  3. The definition to use for the LLM interaction is the chat mode.
    Note: WatsonXChatLLM can be initiated via a single line of code; see https://github.com/i-am-bee/bee-agent-framework/blob/main/examples/llms/providers/watsonx.ts
  4. Create an agent and provide the used tools. In this case, only the OpenMeteoTool contains the function to invoke the weather service.
  5. Create a createConsoleReader, is a part of the downloaded helpers. The reader helps to display all the steps the agent takes easily.
  6. Invoke the agent and display the steps.

System Prompt Template to configure the for a chat used in the following code.

`{{#messages}}{{#system}}<|begin_of_text|><|start_header_id|>system<|end_header_id|>
 
{{system}}<|eot_id|>{{/system}}{{#user}}<|start_header_id|>user<|end_header_id|>
 
{{user}}<|eot_id|>{{/user}}{{#assistant}}<|start_header_id|>assistant<|end_header_id|>
 
{{assistant}}<|eot_id|>{{/assistant}}{{/messages}}<|start_header_id|>assistant<|end_header_id|>`
 

Create a file called src/example-wx-agent.ts copy and past the following code.

import "dotenv/config.js";
import { BeeAgent } from "bee-agent-framework/agents/bee/agent";
import { createConsoleReader } from "./helpers/io.js";
import { FrameworkError } from "bee-agent-framework/errors";
import { Logger } from "bee-agent-framework/logger/logger";
import { OpenMeteoTool } from "bee-agent-framework/tools/weather/openMeteo";
import { UnconstrainedMemory } from "bee-agent-framework/memory/unconstrainedMemory";
import { BaseMessage } from "bee-agent-framework/llms/primitives/message";
import { WatsonXChatLLM } from "bee-agent-framework/adapters/watsonx/chat";
import { WatsonXLLM } from "bee-agent-framework/adapters/watsonx/llm";
import { GenerateCallbacks } from "bee-agent-framework/llms/base";
import { PromptTemplate } from "bee-agent-framework/template";

const logger = new Logger({ name: "app", level: "trace" });
/// *******************************
/// 1. The definition of a chat prompt template.
/// *******************************
const template = new PromptTemplate({
  schema: {
    messages: {
        "system": "",
        "user": "",
        "assistant": "",
    },
  },
  template: `{{#messages}}{{#system}}<|begin_of_text|><|start_header_id|>system<|end_header_id|>

{{system}}<|eot_id|>{{/system}}{{#user}}<|start_header_id|>user<|end_header_id|>

{{user}}<|eot_id|>{{/user}}{{#assistant}}<|start_header_id|>assistant<|end_header_id|>

{{assistant}}<|eot_id|>{{/assistant}}{{/messages}}<|start_header_id|>assistant<|end_header_id|>

`,
});
/// *******************************
/// 2. The integration to watsonx is set up.
/// *******************************
const llm = new WatsonXLLM({
  modelId: "meta-llama/llama-3-70b-instruct",
  projectId: process.env.WATSONX_PROJECT_ID,
  baseUrl: process.env.WATSONX_BASE_URL,
  apiKey: process.env.WATSONX_API_KEY,
  parameters: {
    decoding_method: "greedy",
    max_new_tokens: 500,
  },
});
/// *******************************
/// 3. The definition to use for the LLM interaction the chat mode.
/// *******************************
const chatLLM = new WatsonXChatLLM({
  llm,
  config: {
    messagesToPrompt(messages: BaseMessage[]) {
      return template.render({
        messages: messages.map((message) => ({
          system: message.role === "system" ? [message.text] : [],
          user: message.role === "user" ? [message.text] : [],
          assistant: message.role === "assistant" ? [message.text] : [],
        })),
      });
    },
  },
});
/// *******************************
/// 4. Create an agent and provide the used tools. In this case, only the `OpenMeteoTool` contains the function to invoke the weather service.
/// *******************************
const agent = new BeeAgent({
  llm: chatLLM,
  memory: new UnconstrainedMemory(),
  tools: [
    new OpenMeteoTool()
  ]
});
/// *******************************
/// 5. Create a `createConsoleReader`, is a part of the downloaded helpers. The reader helps to display all the steps the agent takes easily.
/// *******************************
const reader = createConsoleReader();
/// *******************************
/// 6. Invoke the agent and display the steps.
/// *******************************
try {
  let prompt = "How is the current weather in Las Vegas?";
  console.info("Prompt:\n" + prompt + "\n");
  const response = await agent
    .run(
      { prompt },
      {
        execution: {
          maxRetriesPerStep: 3,
          totalMaxRetries: 10,
          maxIterations: 20,
        },
      },
    )
    .observe((emitter) => {
      emitter.on("start", () => {
        reader.write(`Agent 🤖 : `, "starting new iteration");
      });
      emitter.on("error", ({ error }) => {
        reader.write(`Agent 🤖 : `, FrameworkError.ensure(error).dump());
      });
      emitter.on("retry", () => {
        reader.write(`Agent 🤖 : `, "retrying the action...");
      });
      emitter.on("update", async ({ data, update, meta }) => {
        reader.write(`Agent (${update.key}) 🤖 : `, update.value);
      });
      emitter.match("*.*", async (data: any, event) => {
        if (event.creator === chatLLM) {
          const eventName = event.name as keyof GenerateCallbacks;
          switch (eventName) {
            case "start":
              console.info("LLM Input");
              console.info(data.input);
              break;
            case "success":
              console.info("LLM Output");
              console.info(data.value.raw.finalResult);
              break;
            case "error":
              console.error(data);
              break;
          }
        }
      });
    });
    reader.write(`Agent 🤖 : `, response.result.text);
} catch (error) {
  logger.error(FrameworkError.ensure(error).dump());
} finally {
  process.exit(0);
}

3. Run the example

Now, you can run the example on your local machine. The image below (Resource: Image from LangChain), which I also used in the blog post Implementing LangChain AI Agent with WatsonxLLM for a Weather Queries application illustrates very well how the agent works, and you can verify it in the example output later.

The GIF, of an example execution in the introduction, shows the initial system prompt to realize the agent, given by be Bee Agent Framework. Here is an extract I formatted into plain text. The prompt is structured in the following sections: Available functions, Communication structure, Examples, Instructions, Your capabilities, Notes, and Role.
You can see the tool / function for the OpenMeteo information was inserted by the Bee Agent Framework provided.

# Available functions
You can only use the following functions. Always use all required parameters.

Function Name: OpenMeteo
Description: Retrieve current, past, or future weather forecasts for a location.
Parameters: {"type":"object","properties":{"location":{"anyOf":[{"type":"object","properties":{"name":{"type":"string"},"country":{"type":"string"},"language":{"type":"string","default":"English"}},"required":["name"],"additionalProperties":false},{"type":"object","properties":{"latitude":{"type":"number"},"longitude":{"type":"number"}},"required":["latitude","longitude"],"additionalProperties":false}]},"start_date":{"type":"string","format":"date","description":"Start date for the weather forecast in the format YYYY-MM-DD (UTC)"},"end_date":{"type":"string","format":"date","description":"End date for the weather forecast in the format YYYY-MM-DD (UTC)"},"temperature_unit":{"type":"string","enum":["celsius","fahrenheit"],"default":"celsius"}},"required":["location","start_date"],"additionalProperties":false}

# Communication structure
You communicate only in instruction lines. The format is: "Instruction: expected output". You must only use these instruction lines and must not enter empty lines or anything else between instruction lines.
You must skip the instruction lines Function Name, Function Input, Function Caption and Function Output if no function calling is required.

"Message: User's message. You never use this instruction line." 
"Thought: A single-line step-by-step plan of how to answer the user's message. You can use the available functions defined above. This instruction line must be immediately followed by Function Name if one of the available functions defined above needs to be called, or by Final Answer. Do not provide the answer here." 
Function Name: Name of the function. This instruction line must be immediately followed by Function Input.
Function Input: Function parameters. Empty object is a valid parameter.
Function Caption: A single-line description of the function calling for the user.
Function Output: Output of the function in JSON format.
Thought: Continue your thinking process.
Final Answer: Answer the user or ask for more information or clarification. It must always be preceded by Thought.

## Examples
Message: Can you translate "How are you" into French?
Thought: The user wants to translate a text into French. I can do that.
Final Answer: Comment vas-tu?

# Instructions
User can only see the Final Answer, all answers must be provided there.
You must always use the communication structure and instructions defined above. Do not forget that Thought must be immediately followed by either Function Name or Final Answer.
Functions must be used to retrieve factual or historical information to answer the message.
If the user suggests using a function that is not available, answer that the function is not available. You can suggest alternatives if appropriate.
When the message is unclear or you need more information from the user, ask in Final Answer.

# Your capabilities
Prefer to use these capabilities over functions.
- You understand these languages: English, Spanish, French.
- You can translate and summarize, even long documents.

# Notes
 - If you don't know the answer, say that you don't know." 
 - The current time and date in ISO format can be found in the last message.
 - When answering the user, use friendly formats for time and date.
 - Use markdown syntax for formatting code snippets, links, JSON, tables, images, files. "- Sometimes, things don't go as planned. Functions may not provide useful information on the first few tries. You should always try a few different approaches before declaring the problem unsolvable." 
 - When the function doesn't give you what you were asking for, you must either use another function or a different function input." 
 - When using search engines, you try different formulations of the query, possibly even in a different language.
 - You cannot do complex calculations, computations, or data manipulations without using functions.

# Role
You are a helpful assistant.

Here are links two Bee Agent system prompts

3.1 Execution

  • Use following command to install the needed dependencies.
    Note: This is also documented in the README.md of the GitHub project you just created.
npm ci
  • Use following command to execute the agent.
npm run start src/example-wx-agent.ts 

3.2 Output

Here is the simplified output and the display of the execution steps of the agent, and here are the executed steps listed in a row; keep in mind the diagram above.

input -> start -> thought -> select tool -> tool input -> tool caption -> tool_output -> thought -> final answer
  1. Start Large Language Model (LLM) Input
Prompt:
How is the current weather in Las Vegas?
​
Agent 🤖 :  starting new iteration
  1. Thought
Agent (thought) 🤖 :  The user wants to know the current weather in Las Vegas. I can use the OpenMeteo function to retrieve the current weather forecast.
  1. Select tool
Agent (tool_name) 🤖 :  OpenMeteo
  1. Tool input
Agent (tool_input) 🤖 :  {"location":{"name":"Las Vegas","country":"USA","language":"English"},"start_date":"2024-10-23","end_date":"2024-10-23","temperature_unit":"celsius"}
  1. Tool caption
Agent (tool_caption) 🤖 :  Retrieve current weather forecast for Las Vegas.
  1. Agent (tool_output) 🤖 :
...
{"time":"iso8601","interval":"seconds","temperature_2m":"°C","rain":"mm","apparent_temperature":"°C"},"current":{"time":"2024-10-23T08:15","interval":900,"temperature_2m":17.5,"rain":0,"apparent_temperature":13.7},
...
  1. Thought
Agent (thought) 🤖 :  I have retrieved the current weather forecast for Las Vegas.
  1. Final answer
Agent (final_answer) 🤖 :  As of 2024-10-23 08:15, the current temperature in Las Vegas is 17.5°C (63.5°F) with an apparent temperature of 13.7°C (56.7°F). There is no rain currently.

4. Resources

Helpful resource in this context.

Blog posts and repositories

The Framework

Environment

5. Summary

The example is an excellent, small, transparent, and simple example of how the agent works and how to use a model running in watsonx.ai.

For more advanced information about how to use the integration, I recommend visiting the GitHub repository watsonx Platform Demos provided by Niklas Heidloff and the Bee project on GitHub.


I hope this was useful to you and let’s see what’s next?

Greetings,

Thomas

#watsonx, #typescript, #ai, #ibm, #granite, #agents, #ai, #beagentframework, #beagent, #llama, #aiagents

Leave a comment

This site uses Akismet to reduce spam. Learn how your comment data is processed.

Blog at WordPress.com.

Up ↑