
This blog post is about an example web chat application using a large language model (LLM) running on watsonx, and the User Interface is built with Streamlit.io. It emphasizes motivation, architecture, code sections, and local setup. The application features basic authentication, connection to watsonx, and user-friendly options for interaction, showcasing Streamlit’s potential for rapid prototyping.
This is different to one of my last blog posts called: Create a Full-Screen Web Chat with Watson Assistant, IBM Cloud Code Engine and watson.ai; I used only one web-page and didn’t implement an entire application.
- Motivation
- The example chat in the web application
- Simplified architecture dependencies of the source code
- Interesting sections of the code
- Set up the example locally
- Run the web application locally
- Run the web application locally in a container
- Additional resources
- Summary
1. Motivation
I want to build a simple web chat application and not use watsonx Assistant for this simple chat interaction. A single web application enables us to deploy one container to a container engine directly interacting with watsonx and doesn’t use an additional service.
In addition, how Streamlit.io works, which is becoming increasingly known for its ease of use. It allows you to build a simple web application using only Python, which is one of the preferred programming languages for data scientists.
Statement of Streamlit.io on their website.
“Streamlit turns data scripts into shareable web apps in minutes. All in pure Python. No front‑end experience required.”
2. The example chat in the web application
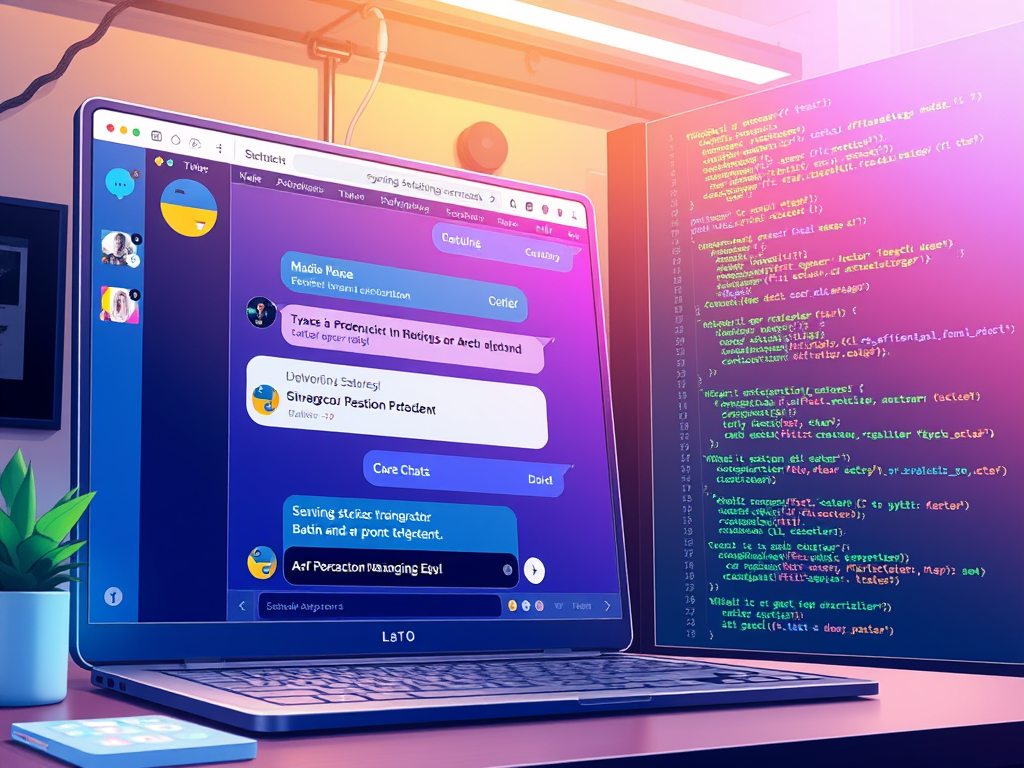
The GIF below shows an user interaction with the web application running on the local machine.
Note: You can find the example code in this GitHub repository: https://github.com/thomassuedbroecker/watsonx_streamlit_chat_webapp_example
Here is an overview of what the example web application should contain:
- What should our example web chat application contain?
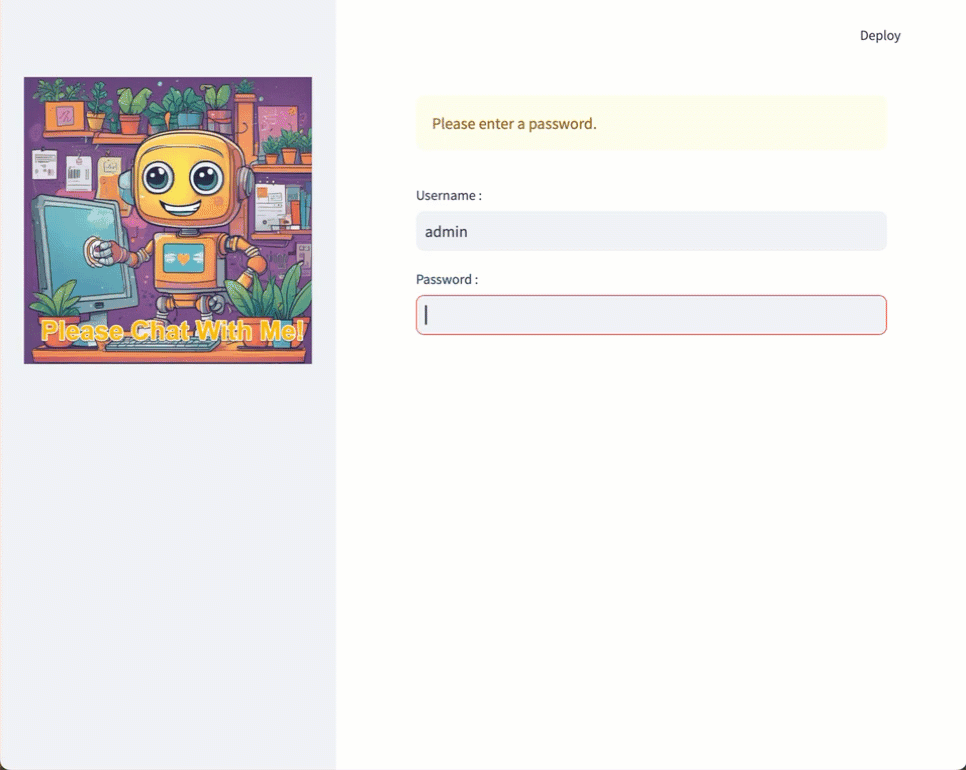
- A very simple basic authentication (source code)
- A connection to watsonx for integration with the LLM (source code)
- With streaming of the response
- With non streaming of the response
- Implement a history to save the interaction history with the LLM
- Give the user the possibility to select various LLM to interact
- Show the actual prompt sent to the model to make the interaction transparent
- How should the application run?
- On the local machine
- In a container on the local machine
- How to configure the application?
- Therefore, we generate a
.envfile- We need to provide basic authentication in this application, a user and a password
- We need to provide the needed connection to watsonx
- Therefore, we generate a
- Programming language:
Python - Local container engine:
Podman - Model inference: IBM Cloud with watsonx
3. Simplified architecture dependencies of the source code
The image below shows the simplified dependencies of the source code
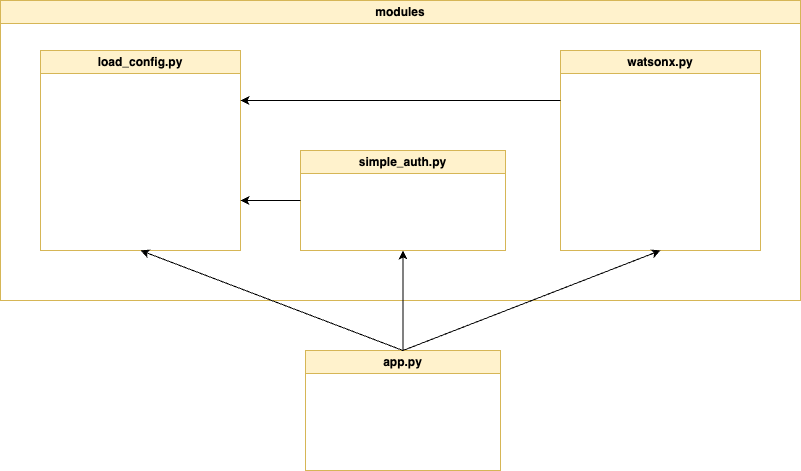
The table below contains short descriptions for the source code files.
| Code | Description |
|---|---|
load_config.py | Configuration settings for watsonx and web application authentication |
simple_auth.py | This code doesn’t use the Streamlit.io secrets.toml Out-Of-The-Box functionality, it implements very simple two authentication functions: 1. authenticate_user(): Checks the username and password against the app’s configuration, setting `authenticated` to True if they match, or False with an error message if not. 2. creds_entered(): Checks the `authenticated` state when the user enters credentials. It returns True if authenticated; otherwise, it prompts for re-entry and returns False. |
watsonx.py | This class provides an interface to IBM Watson AI services for streaming and non-streaming. |
app.py | The web application includes basic authentication, connection to the watsonx service, and support for both streaming and non-streaming interactions with large language models (LLMs). The code also implements a history feature to save interactions with the LLM and allows the user to select different LLMs for interaction. The actual prompt sent to the current LLM is displayed to make the interaction transparent. |
4. Interesting sections of the code
In this chapter highlights some of the easy code to implement the functionality with Streamlit.io.
- The session_state is a very useful element to save the history we need to implement a chat with an LLM.
Here is how to add and use the session_state to generate a chat history list.
# Initialize chat history and set system prompt
    if "messages" not in st.session_state:
       st.session_state.messages = []
       st.session_state.messages.append({"role": "system", "content": getSystemPrompt()})

    # Reset history and reset system prompt
    if reset_button:
       st.session_state.messages = []
       st.session_state.messages.append({"role": "system", "content": getSystemPrompt()})
- The easy usage of the selectbox helps easily to configure the web application.
def chat_type_select_box():

 label = "Select how you want to interact with the model in the Chat."
 options = ['streaming', 'non-streaming']
 chat_type = st.selectbox(label, options, index=1, key=None, help=None, on_change=None, args=None, kwargs=None, placeholder="Choose an option", disabled=False, label_visibility="visible")
     return chat_type
- The easy usage of the sidebar helps to provide additional information in the User Interface.
if chat_type == "streaming":
# Display assistant response in chat message container
with st.chat_message("assistant"):
with st.sidebar:
st.markdown(f"# Your chat prompt: :sunglasses:\n```text{generate_message_prompt()}```", unsafe_allow_html=False, help=None)
stream_response = response_stream_generator( model_id=model_id )
- The easy usage of the button helps reset content in the user interface.
reset_button= st.button("Reset Chat", icon="🔄", type="primary")
...
    # Reset history and reset system prompt
    if reset_button:
      st.session_state.messages = []
      st.session_state.messages.append({"role": "system", "content": getSystemPrompt()})
5. Set up the example locally
The setup is only tested on MacOS and with the container engine Podman.
- Clone the repository
git clone https://github.com/thomassuedbroecker/watsonx_streamlit_chat_webapp_example.git
- Navigate to the
codedirectory
cd watsonx_streamlit_chat_webapp_example/code
- Generate an environment file from the template
cat .env_template > .env
Set the needed values.
Note: Setup watsonx on IBM Cloud: https://youtu.be/-Kx_C8yVtgw?si=xnWfskDv2TTp53Gp&t=845
# WATSONX
export WATSONX_APIKEY=XXX
export WATSONX_REGION=eu-de
export WATSONX_PROJECT_ID=XXX
# APP
export APP_USER=admin
export APP_PASSWORD=admin
5.1 Run the web application locally
- Generate a virtual Python environment
python3 -m venv .venv
source ./.venv/bin/activate
- Install the needed libraries
python3 -m pip install -r requirements.txt
- Load the current environment variables
source .env
- Run the application
streamlit run app.py
- Open the browser using the port
8501
http://localhost:8501
5.2 Run the web application locally in a container
If your application works locally, it should also work in a container using Podman. To build and run the container, you can use the bash script build_run_podman.sh in the cloned repository.
Note: You can find details related to the container in the README_CONTAINER.md.
- Execute following bash
bash build_run_podman.sh
- Open the browser using the port
8080
http://localhost:8080
Note: Code of the bash automation.
#!/bin/bash

# load environment variable
source .env

# delete existing container
podman rm chat-demo

# build new container
podman build -t chat-demo:0.0.1 -f ./Dockerfile.podman_root

# run container on the local computer
podman run -it -p 8080:8080 -e WATSONX_APIKEY=${WATSONX_APIKEY} \
                            -e WATSONX_PROJECT_ID=${WATSONX_PROJECT_ID} \
                            -e WATSONX_REGION=${WATSONX_REGION} \
                            -e APP_USER=${APP_USER} \
                            -e APP_PASSWORD=${APP_PASSWORD} \
                            --name chat-demo \
                            "localhost/chat-demo:0.0.1"
6. Additional resources
- Streamlit documentation
- System prompt
- Config file
- Basic Authentication for Streamlit Dashboard / Web App
- React or Vue, which JS framework is best?
7. Summary
From my perspective, streamlit.io is very powerful and can boost your prototype creation in the AI area because sometime building an User Interface can be challenging.
Usually, developers build user interfaces using React or Vue.js, javascript, Java, and HTML3, but this requires more programming skills, and here, an AI engineer can just use Python.
You can examine, for example, the blog post React or Vue, which JS framework is best, and when it makes sense to use various UI frameworks as a developer.
Using Streamlit is a fast way to provide a good-looking application when you want to present some simple data or small interaction.
The downside is that you must be able to notice and be honest with yourself: when should you end the prototyping, and are you starting to develop a software product?
I hope this was useful to you and let’s see what’s next?
Greetings,
Thomas
#watsonx, #ai, #ibm, #streamlit, #ui, #containers, #python, #uidevelopment
