

I’ve been exploring AI agents—starting with LangChain, then experimenting with BeeAI, CrewAI, LangGraph (blog post coming!), and most recently watsonx Orchestrate Developer Edition. Now I’m starting with Langflow, a visual flow builder that reminds me of Node-RED (Node.js) but for Python. Join my journey and my first impressions.
Here are some of my agent related blog posts:
- Implementing LangChain AI Agent with WatsonxLLM for a Weather Queries application
- My Bee Agent Framework and watsonx.ai development Learning Journey
- Getting Started with Local AI Agents in the watsonx Orchestrate Developer Edition
“Langflow is a powerful tool to build and deploy AI agents and MCP servers. It comes with batteries included and supports all major LLMs, vector databases and a growing library of AI tools.” Langflow
I prefer visualizations for better understanding, as I began my development career with UML (for round-trip source code generation … wonderful). However, because I am familiar with this approach, I know it can be too complex when attempting to visualize and configure everything in a diagram. As a result, developers may lose acceptance of it.
In this blog post, I want to show you my first step into Langflow; how to install Langflow, build an agent using models from watsonx.ai, as well as create a standard example for a simple tool for the agent using with a custom component.
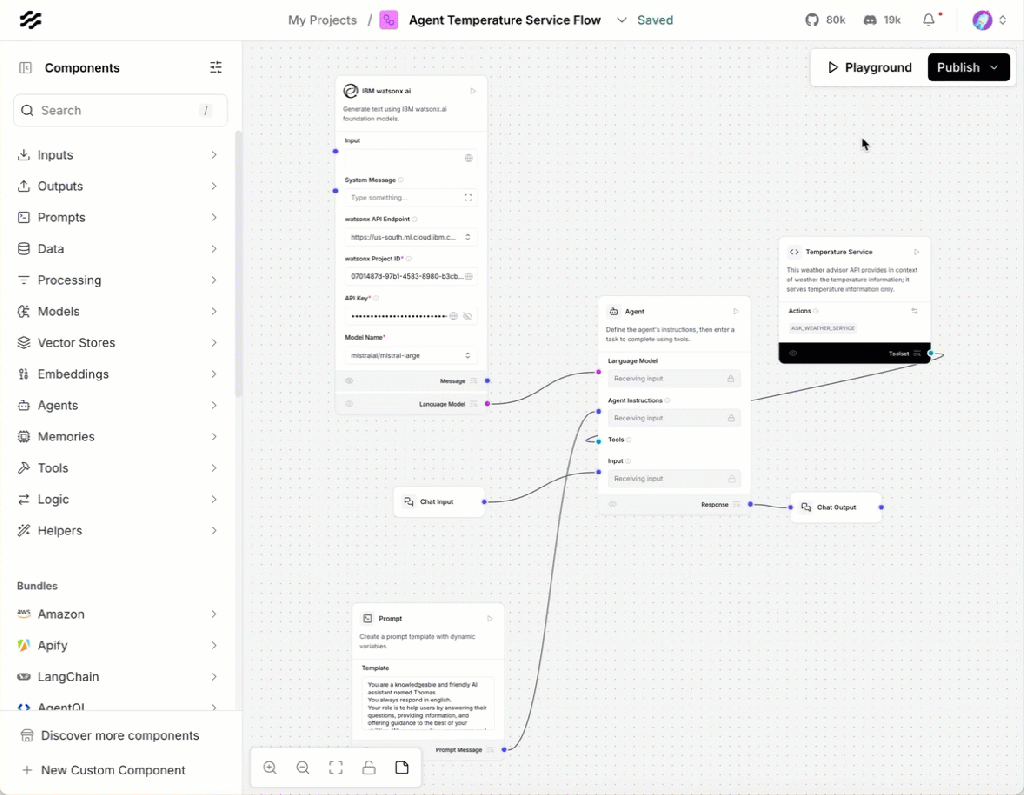
The image below shows the final flow configuration.
- watsonx.ai as model input for the agent
- Prompt as input for the agent instruction
- Tools based on a custom component with will be generated during the example
- Chat input and output to test the agent later in the playground

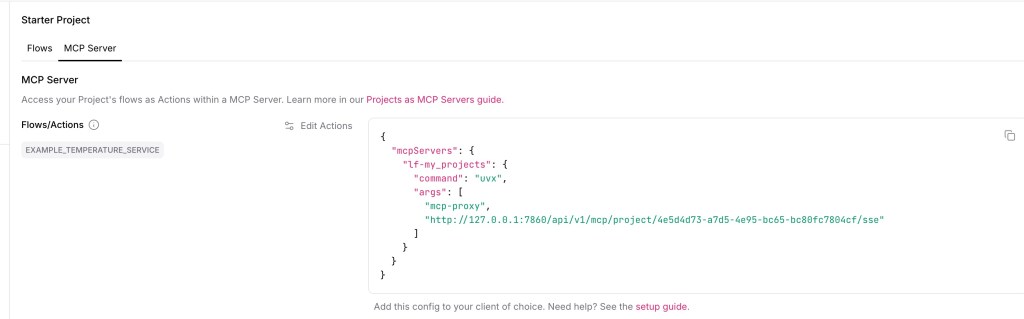
I noticed that Langflow provides out-of-the-box a model context protocol (MCP) server to access my generate access agent flow.
During the journey from installation to a running flow in the playground locally, we will see that Langflow attempts to provide a combination of mostly “pure source” implementations and drawings. It feels a bit like NodeRed (Node.js) with JavaScript, and with Langflow, you get Python.
I used the following resources to get started with Langflow:
- Langflow with IBM watsonx AI Component
- Building agentic Applications with Langflow and MCP
- Resource for the prompt
- Building agentic Applications with Langflow and MCP
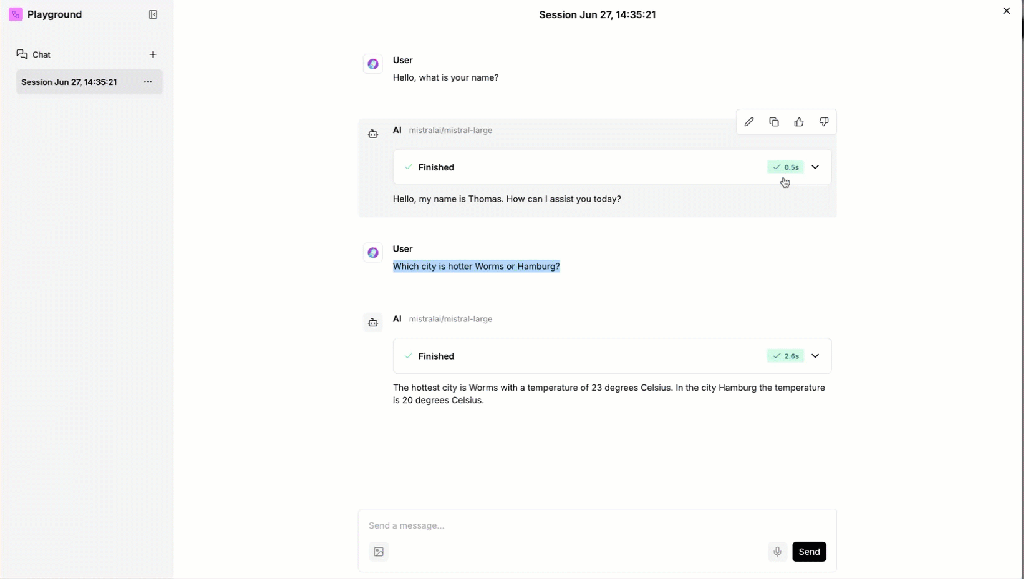
The GIF below shows the final result for the usage in the playground. Based on the agent instructions containing the name of the agent in the prompt and the custom component (tool) for the temperature service.
- Question:
Hello, what is your name? - Question:
Which city is hotter Worms or Hamburg?
Let’s start:
- Prerequisites
- The setup
- Installation
- Run the Langflow server
- Open browser and access Langflow
- Create an example Agent with a tool to serve temperature information
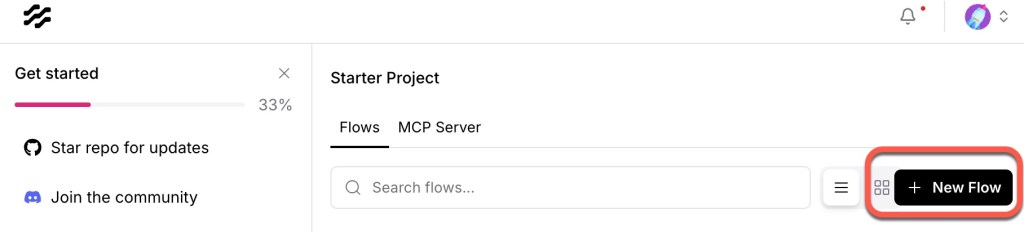
- Create a new flow and select blank flow
- Set up the connection to a watsonx.ai model
- Add an Agent and connect the watsonx.ai model as input
- Add a prompt as input for the agent instructions
- Add a
Custom Componentto create the custom tool and verify the tool works - Finally, add Chat input and Chat output and connect the tool to the agent
- Use the
playgroundto test the agent interaction
- Summary
1. Prerequisites
- watsonx.ai project
- Python 3.12 installed
2. The setup
The setup is easy and well-documented.
2.1 Installation
These are the commands I used for the installation. Using only the Pip package manager for the setup, even when Langflow uses uv as it own package manager from Astral.
mkdir langflow_installation
cd langflow_installation
python3.12 -m venv .venv
source ./.venv/bin/activate
python3 -m pip install --upgrade pip
python3 -m pip install ibm-watsonx-ai
python3 -m pip install -qU langchain-ibm
python3 -m pip install uv
uv pip install langflow -U
2.2. Run the Langflow server
uv run langflow run
- Output
...
INFO:httpx:HTTP Request: GET https://pypi.org/pypi/langflow/json "HTTP/1.1 200 OK"
╭─────────────────────────────────────────────────────────────────────────╮
│                                                                         │
│  Welcome to Langflow                                                    │
│                                                                         │
│  🌟 GitHub: Star for updates → https://github.com/langflow-ai/langflow  │
│  💬 Discord: Join for support → https://discord.com/invite/EqksyE2EX9   │
│                                                                         │
│  We collect anonymous usage data to improve Langflow.                   │
│  To opt out, set: DO_NOT_TRACK=true in your environment.                │
│                                                                         │
│  🟢 Open Langflow → http://127.0.0.1:7860                               │
│                                                                         │
╰─────────────────────────────────────────────────────────────────────────╯
INFO:httpx:HTTP Request: GET https://langflow.gateway.scarf.sh?package=langflow&version=1.4.3&platform=macOS-15.5-arm64-arm-64bit&python=3.12&arch=64bit&autoLogin=true&cacheType=async&backendOnly=false&desktop=false "HTTP/1.1 200 OK"
INFO:httpx:HTTP Request: GET https://api.langflow.store/items/tags?fields=id%2Cname "HTTP/1.1 200 OK"
2.3. Open browser and access Langflow
http://127.0.0.1:7860/
3. Create an example Agent with a tool to serve temperature information
3.1 Create a new flow and select blank flow

Edit the name of the flow.
Name: Agent Temperature Service Flow

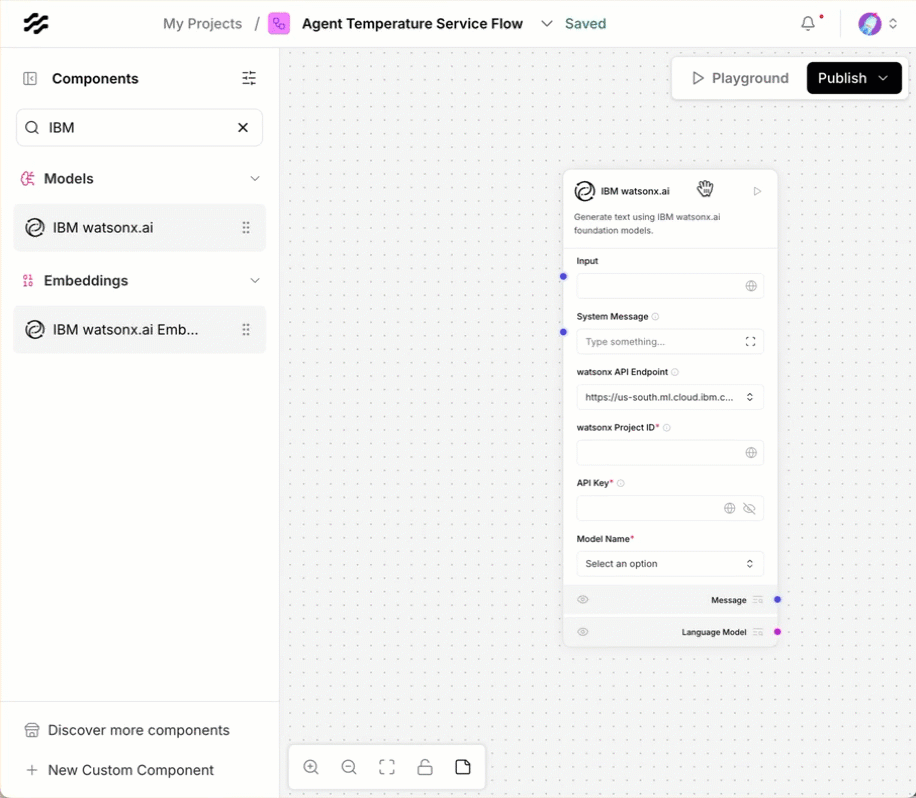
3.1. Set up the connection to a watsonx.ai model
Select Models/watsonx, we need only:
- Endpoint
- watsonx Project ID
- API Key
- Model name (I used
mistralai/mistral-large)

You can select the endpoint from the predefined regions.

But you can change in implementation of this component and add an endpoint if an endpoint would be missing.
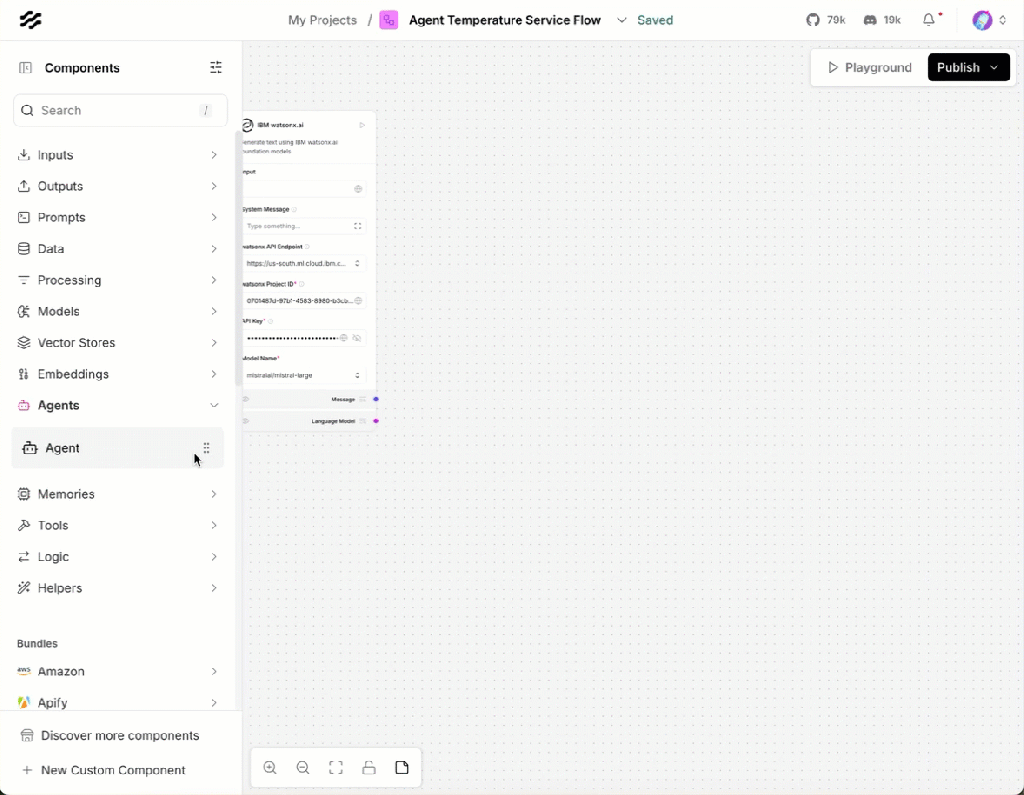
3.2 Add an Agent and connect the watsonx.ai model as input
Select Custom as model and then connect the watsonx.ai Model to the agent as input.
3.2.1 Optional inspection: How is the agent implemented?
I want to find out where the basic agent system prompts originate, similar to what I described in the blog post Implementing LangChain AI Agent with WatsonxLLM for a Weather Queries application.
When we are going to inspect the Langflow agent we find the LCAgentComponet.

When we inspect the related code in the Langflow repository, used to build its agents based on the agent implementations in Langchain, we find that it uses the agent types defined in Langchain, as seen in this link.

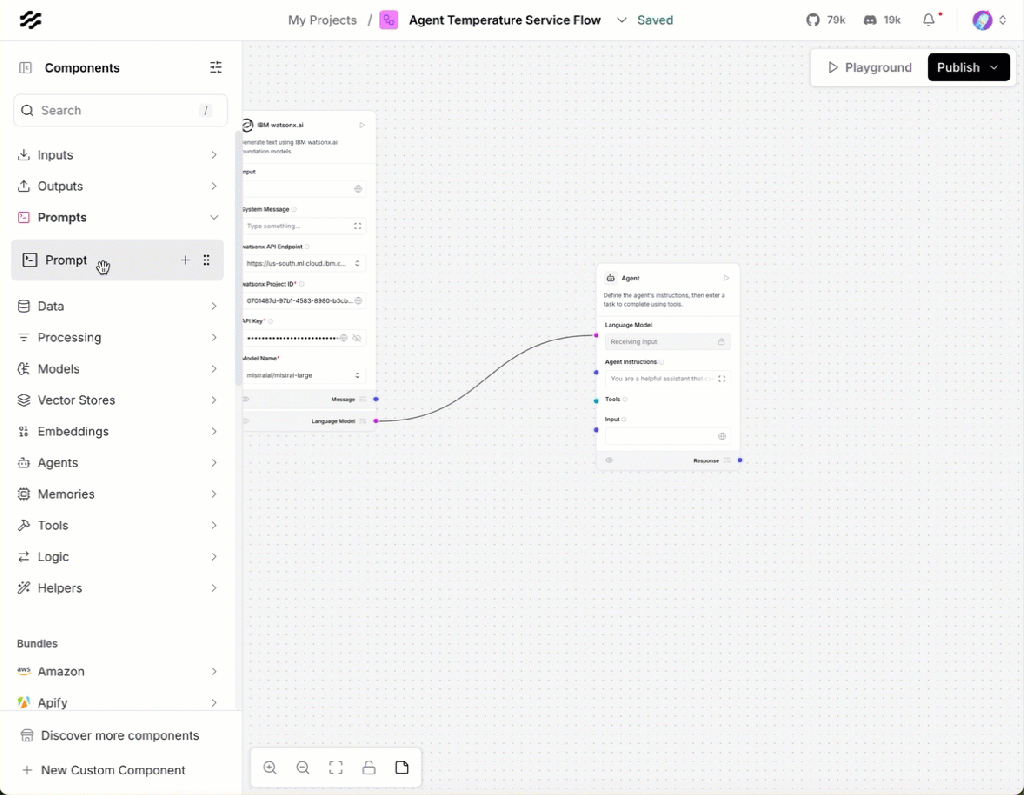
3.3 Add a prompt as input for the agent instructions
The gif shows how it works.

We can insert following prompt as input:
You are a knowledgeable and friendly AI assistant named Thomas.
You always respond in english.
Your role is to help users by answering their questions, providing information, and offering guidance to the best of your abilities. When responding, use a warm and professional tone, and break down complex topics into easy-to-understand explanations.
If you are unsure about an answer, it's okay to say you don't know rather than guessing.
You must understand all languages but you must answer always in proper german language.
If there are terms that are technical topics in English and they are commonly known in English, don't translate the keywords.
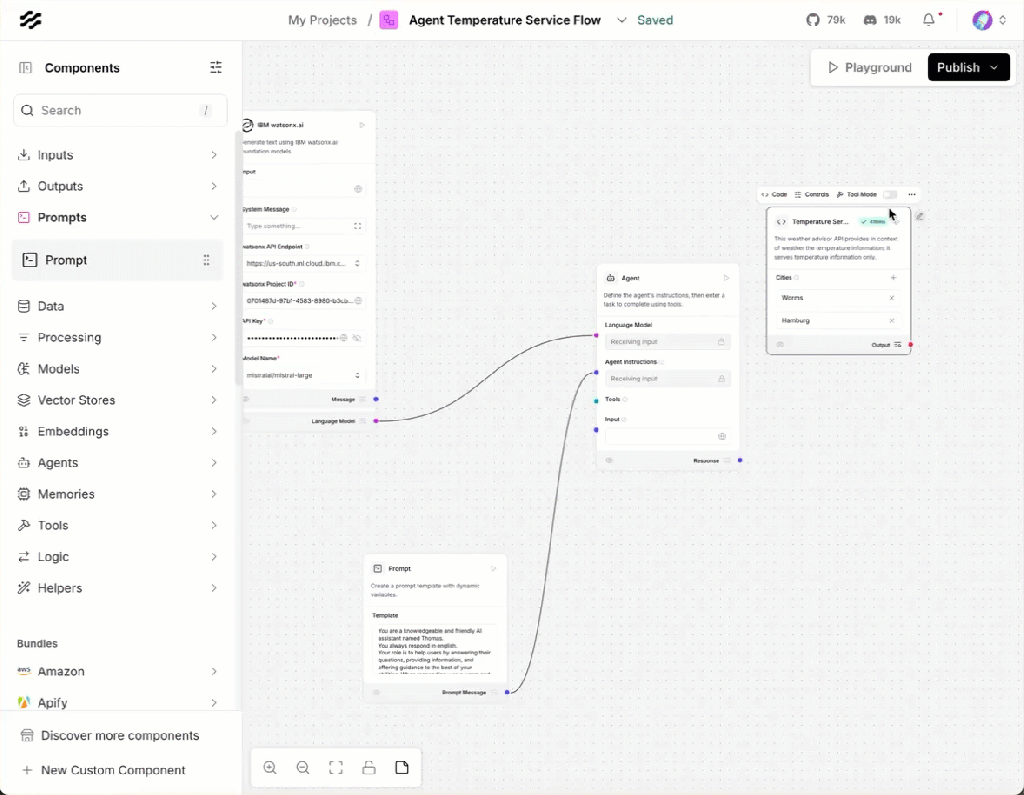
3.4. Add a Custom Component to create the custom tool and verify the tool works
The GIF below illustrates how to do it with the given information in Langflow.
Now, we write our custom local tool. Therefore, we reuse the tool from my blog post Implementing LangChain AI Agent with WatsonxLLM for a Weather Queries application.
We define an input as a list. I use a list as input to check how to customize a parameter for the input to tools when I start with agent frameworks and their tool definitions.
is_list=True,
tool_mode=True
For the tool, we can insert the prepared code below:
# from langflow.field_typing import Data
from langflow.custom import Component
from langflow.io import MessageTextInput, Output, StrInput
from langflow.schema import Data

class TemperaturSeriveComponent(Component):
    display_name = "Temperature Service"
    description = "This weather advisor API provides in context of weather the temperature information; it serves temperature information only."
    icon = "code"
    name = "temperature_service_component"

    inputs = [
        StrInput(
            name="cities",
            display_name="Cities",
            info="Contains a string list with city names separated with commas 'Worms,Hamburg,Berlin",
            is_list=True,
            tool_mode=True
        )
    ]

    outputs = [
        Output(display_name="Output", name="output", method="ask_weather_service"),
    ]

    def ask_weather_service(self) -> Data:
        base_weather_url="https://wttr.in/"
        cities_input = self.cities
        cities = []

        for city in cities_input:
              # Ensure to get the JSON format: '?format=j1'
              city_temp_url = base_weather_url + city + "?format=j1"
              response = requests.get(city_temp_url)
              if (response.status_code == 200):
                  # convert from byte to text
                  byte_content = response.content
                  text_content = byte_content.decode("utf-8")

                  # load json
                  content = json.loads(text_content)

                  # extract temperature
                  temperature = content['current_condition'][0]['temp_C']
                  cities.append({"city": city, "temperature":temperature})
              else:
                  cities.append({"city": f"{city} ERROR", "temperature":0})
        full_text = ""
        sorted_by_temperature =  sorted(cities, key=lambda x: (x['temperature'], x['city']), reverse=True)
        i = 0
        for city in sorted_by_temperature:
            if (i == 0):
                 response_text =  f"The hottest city is {city['city']} with a temperature or {city['temperature']} degrees Celsius."
            else:
                 response_text =  f"In the city {city['city']} the temperature is {city['temperature']} degrees Celsius."
            i = i + 1
            full_text = full_text + ' ' + response_text

        data = Data(value=full_text)
        self.status = data

        return data
3.5 Finally, add Chat input and Chat output and connect the tool to the agent
Set the tool to tool mode and connect it to the agent. Inser Inputs/Chat Input and Inputs/Chat Output as we see in the GIF below.
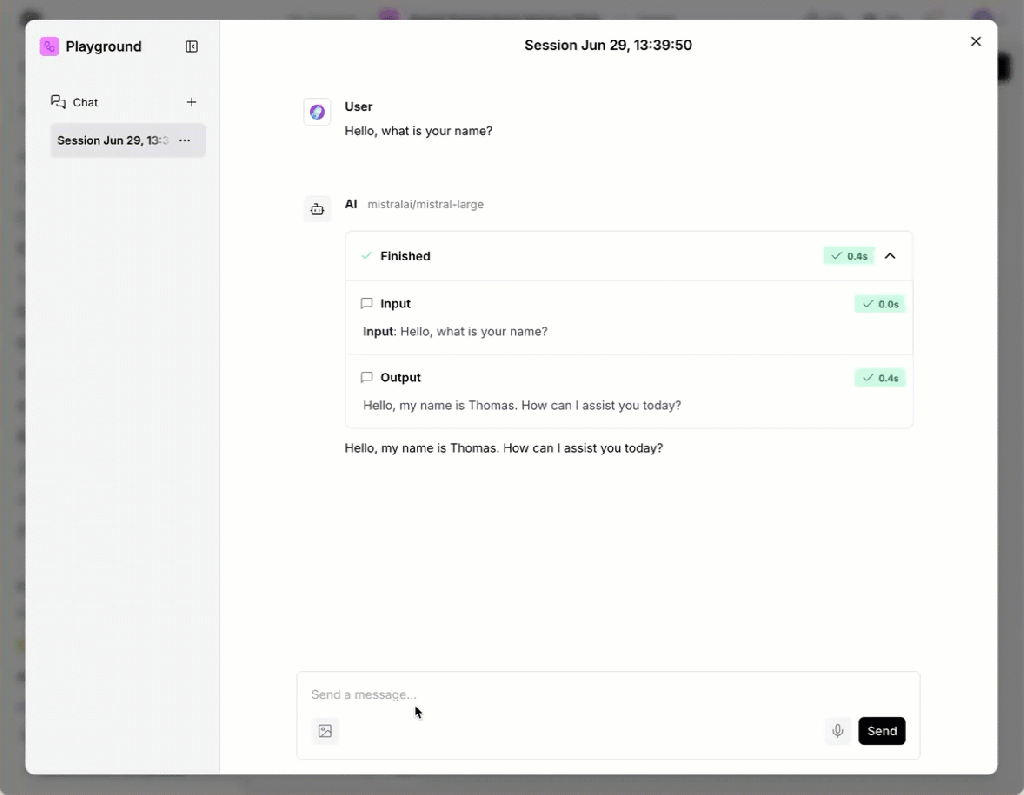
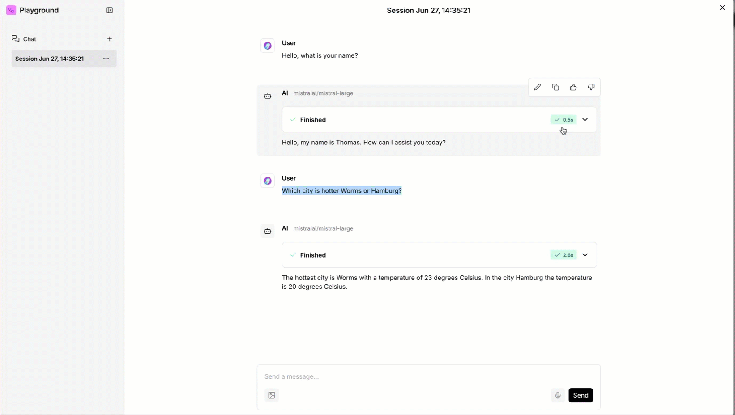
3.6 Use the playground to test the agent interaction
Now, you can use the playground as a chat interaction with our new agent and his tool.
- Question:
Hello, what is your name?
- Question:
Which city is hotter Worms or Hamburg?
The gif below shows the result of the execution in the playground.
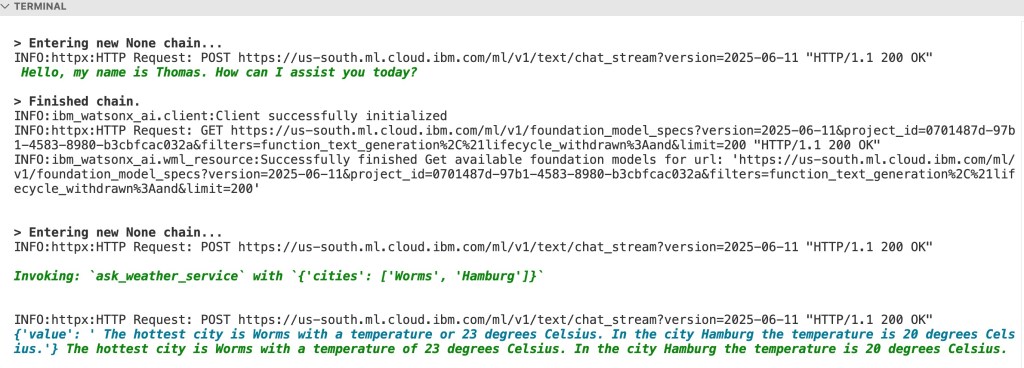
We can also inspect the output in the server terminal session, as shown in the image below.
4. Summary
Langflow is easy to install and easy to use and enables the good combination of coding and visualization. I like it directly for initial prototyping.
I like that you can modify the code for all components; as far as I have seen, you have put it into the flow.
It directly generates a MCP server access for newly generated flows, to integrate the flow to other flow or agents.
For me, it is also essential to see in the future the integration to DevOps; this integration needs to be verified from my perspective. For example, How to add a flow to source control. Maybe to be exported, as is possible in Node-RED, to JSON, but this feature for Python is not part of the plan, as I noticed in this GitHub issue, let’s see which export format it will be.
You can export the flow in a JSON format 😉 like in NodeRed, as you can see in the GIF below.

I hope this was useful to you and let’s see what’s next?
Greetings,
Thomas
#Langflow, #watsonx, #AIagents, #CustomComponent, #Python, #VisualProgramming, #MCP, #TemperatureService, #AItools, #Prototyping,
