

This blog post discusses integrating a custom Python tool into the Bee Agent using the Bee UI to provide real-time weather information for multiple cities. The process entails setting up the Bee stack, customizing the agent, and testing its functionality to retrieve temperatures, emphasizing the tool’s straightforward implementation and potential future applications.
Note: The initial code for the Python tool for real-time weather is a part of my blog post Implementing LangChain AI Agent with WatsonxLLM for a Weather Queries application.
Adding a custom Python tool real-time weather to a Bee Agent in the Bee UI is easy. We will be able to ask the question:
What is the actual temperature in Munich, Hamburg, New York?
Ultimately, we will see if we can answer the question with our tool and custom agent, as we can see in the GIF below.

We will use the Bee infrastructure stack and the Bee-API (v0.0.20) and Bee-UI (v0.0.20) GitHub repositories, the setup is described in the blog post CheatSheet “Ready to Go” for Bee API and UI development, the current blog post is written on 2024.12.19 and uses the updated versions of the repositories Bee Stack, Bee API, Bee UI and Podman as container engine.
- After the updates, don’t forget to update your packages for the Bee API and the Bee UI
pnpm install
FYI: Also, my TypeScript Travel Agent example is installed on my machine, and the Travel Agent is working on these versions for the Bee Stack. If you don’t know it take a look into my blog post A Bee API and Bee UI development example for adding a TypeScript tool made for the Bee Agent Framework.
If you are only interested to get the Python tool running, you can follow this video for a simpler setup ;-).
Table of content
- Motivation
- Setup
- Start your Bee infrastructure stack, Bee API, and UI.
- Customize a Bee agent with a custom tool
- Add the Python tool
- Open the Bee – UI
- Open the tool menu
- Add the Python tool
- Add a custom new Agent
- Select New Agent
- Start building
- Delete all default tools for the agent
- Add the newly created custom weather tool
- Test your custom agent
- Observe what we have done in the UI
- Add the Python tool
- Generate an app
- Summary
1. Motivation
After I added a TypeScript tool to the Bee API system, I wanted to examine the Bee UI capabilities and the creation and combination of custom Python tools with a Bee Agent.
The image below is a very simplified architecture dependencies overview of a Bee agent and tools (TypeScript and Python) in the Bee UI.

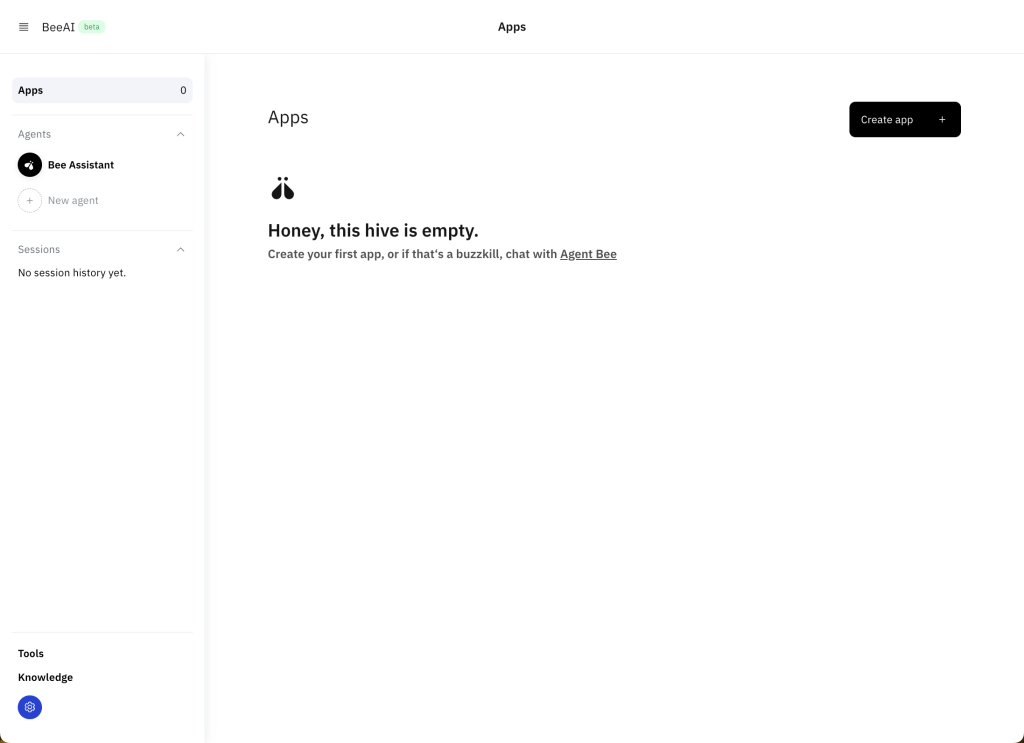
In addition to this, I want to initially check out what the app builder is planning to do in the Bee UI.
2. Setup
1. Start your Bee infrastructure stack, Bee API, and UI.
Follow the steps in the blog post CheatSheet “Ready to Go” for Bee API and UI development to configure and using watsonx.ai.
3. Customize a Bee agent with a custom tool
3.1 Add the Python tool
Step 1: Open the Bee – UI
Step 2: Open the tool menu
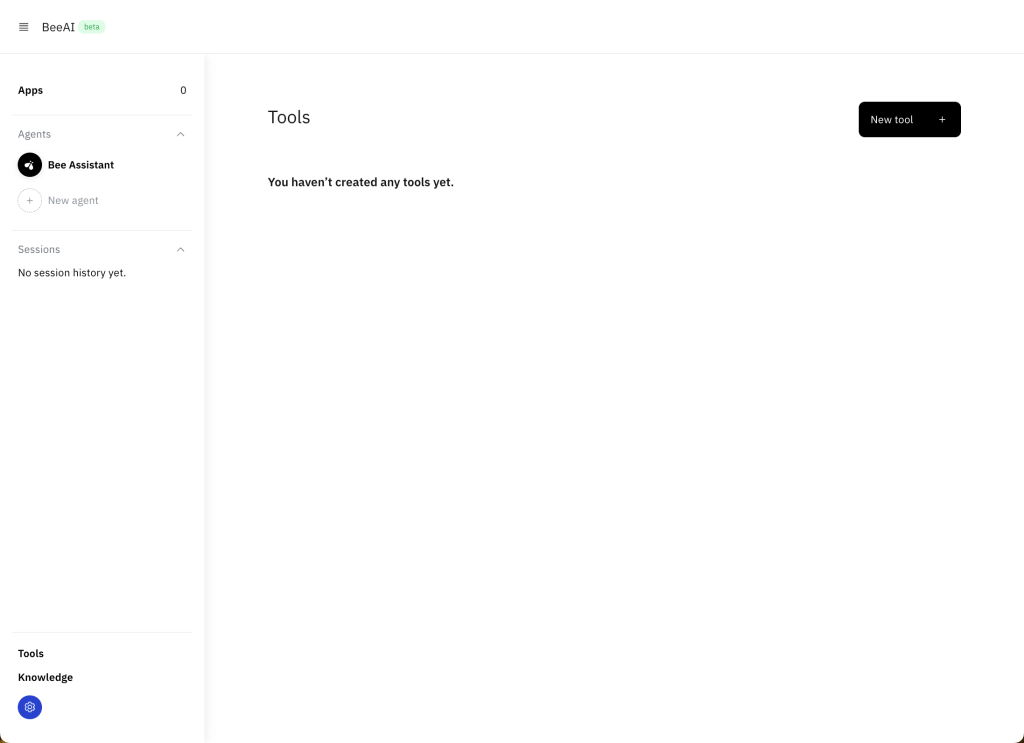
Step 3: Add the Python tool
The initial code for the Python tool is a part of my blog post Implementing LangChain AI Agent with WatsonxLLM for a Weather Queries application. The difference is that at the moment from typing import List doesn’t work, so there are Python code limitations at the moment for adding Python tools.
(The problem is solved in a newer version)
So I changed the input to a string cities_input_string: str
- Tool name
custom weather temperature service
- Source Code
Note: Sometimes, copying and pasting the code from WordPress can cause problems. If this happens on your side, put the code into an editor and verify the Python format.
import json
import requests

def custom_weather_service(cities_input_string: str) -> dict:
   """
   Weather advisor API provides all of the weather needs and information in that API; it serves temperature information. The temperature will be in clecius
   : param cities: Contains a string list with city names separated with commas "Worms,Hamburg,Berlin"
   : return: Returns a list [{"city": "Worms", "temperature": "11"}, {"city": "Hamburg", "temperature": "10"}, {"city": "Berlin", "temperature": "9"}]
   """
   print(f"cities_input_string")
   base_weather_url="https://wttr.in/"
   cities_input = cities_input_string.split(",")
   cities = []
   for city in cities_input:
        # Ensure to get the JSON format: '?format=j1'
        city_temp_url = base_weather_url + city + "?format=j1"
        response = requests.get(city_temp_url)
        if (response.status_code == 200):
           # convert from byte to text
           byte_content = response.content
           text_content = byte_content.decode("utf-8")
           # load json
           content = json.loads(text_content)
           # extract temperature
           temperature = content['current_condition'][0]['temp_C']
           cities.append({"city": city, "temperature":temperature})
        else:
         cities.append({"city": f"{city} ERROR", "temperature":0})
   sorted_by_temperature =  sorted(cities, key=lambda x: (x['city'],x['temperature']), reverse=True)
   result_text_list = json.dumps(sorted_by_temperature)
   return result_text_list

The image below shows, now is the custom tool available.

3.2. Add a custom new Agent
Step 1: Select New Agent
This selection Start from scratch starts a new wizard.
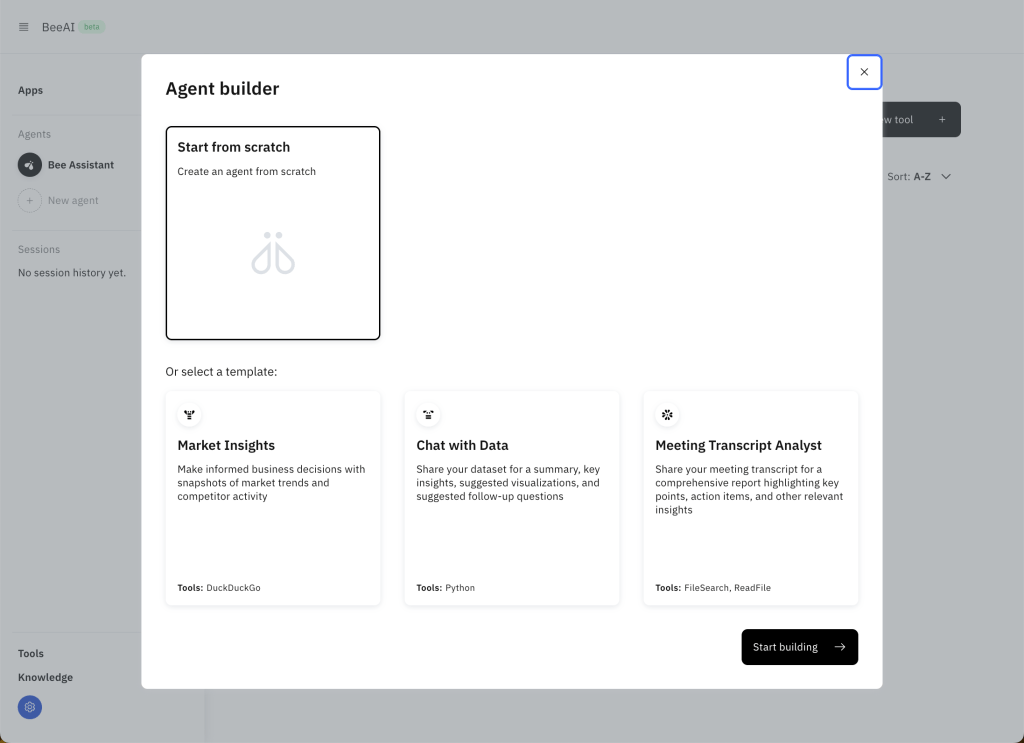
Step 2: Start building
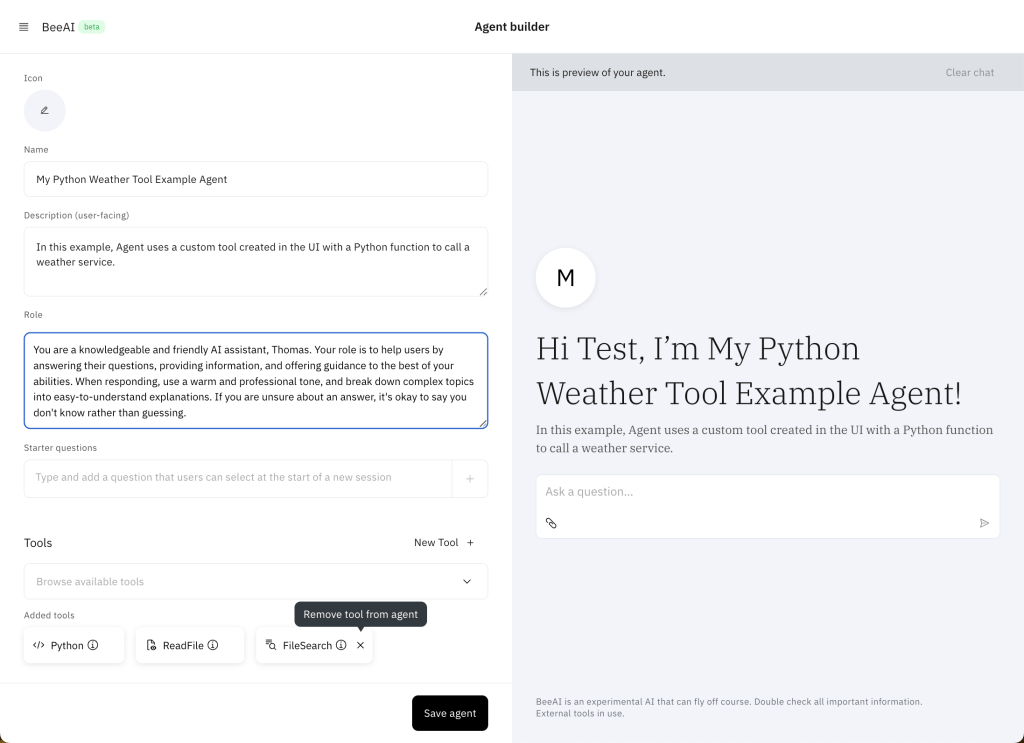
Note: Don’t forget all that you write in the boxes will be used in the system prompt for your customized Bee agent.
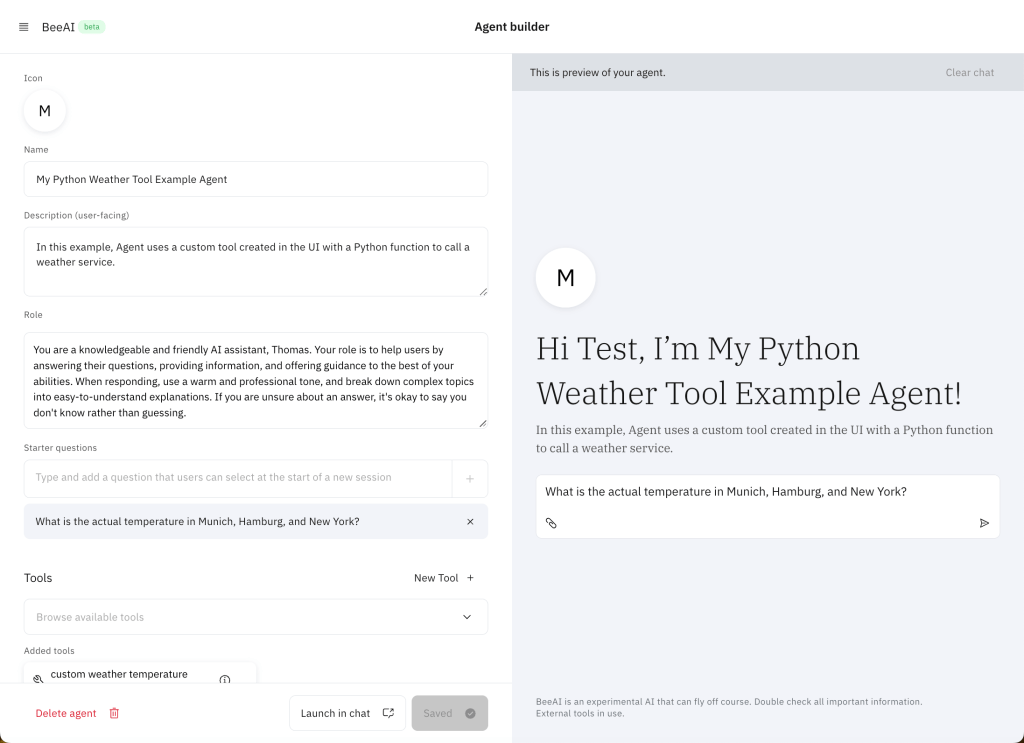
- Name: My Python Weather Tool Example Agent
- Description: In this example, the agent uses a custom tool created in the UI with a Python function to call a weather service.
- Role: You are a knowledgeable and friendly AI assistant, Thomas. Your role is to help users by answering their questions, providing information, and offering guidance to the best of your abilities. When responding, use a warm and professional tone, and break down complex topics into easy-to-understand explanations. If you are unsure about an answer, it’s okay to say you don’t know rather than guessing.
- The following image shows what happens when you ask your agent later for his name.

- Starter Question:
What is the actual temperature in Munich, Hamburg, and New York?
The image below shows a partly filled out UI of the custom Bee Agent configuration.

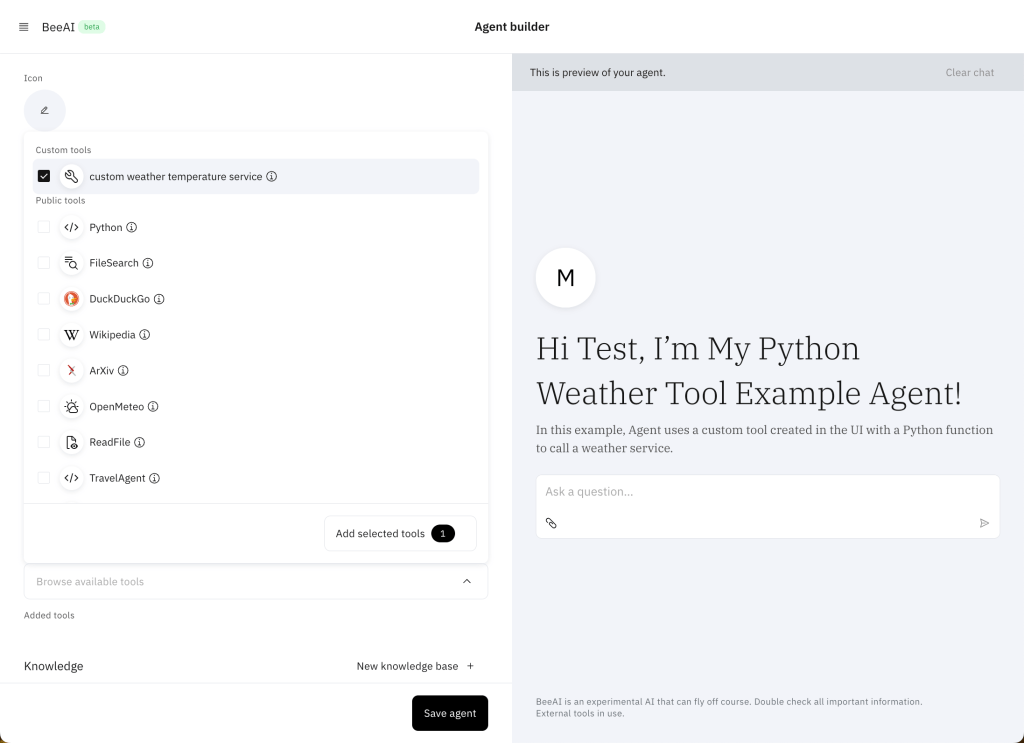
Step 3: Delete all default tools for the agent
The image below shows where you need to delete the existing system tools for the agent.
Step 4: Add the newly created custom weather tool
- Ensure you press Add selected tools.
2. Press save to save your agent.
3.3. Test your custom agent
- Check out the question:
What is the actual temperature in Munich, Hamburg, and New York?

Not all cities were found because the Agent only submitted Munich, Hamburg to the tool as an input parameter.
We don’t know why the Agent didn’t create the following text from the question: “Munich,Hamburg,New York” Maybe the tool needs more detailed instructions for parameter creation.
We know the name, description, parameter, and return value documentation will be inserted into the Agent’s reasoning prompt.
So, the model could not fully understand what it had to do to create the proper parameters from the given text.
- Now let’s try it with this question:
Now we have the cities in a comma separated list, maybe the Agent can better identify the complete list of cities.
What is the actual temperature in Munich, Hamburg, New York?

This works our question is now, should we change the agent model or should we change the description of the tool parameter to make more clear definition how to use the tool?
The current description:
"""
: param cities: Contains a string list with city names separated with commas "Worms,Hamburg,Berlin"
"""
3.4. Observe what we have done in the UI
You can access the sessions we did in the UI, and we see the detailed information.
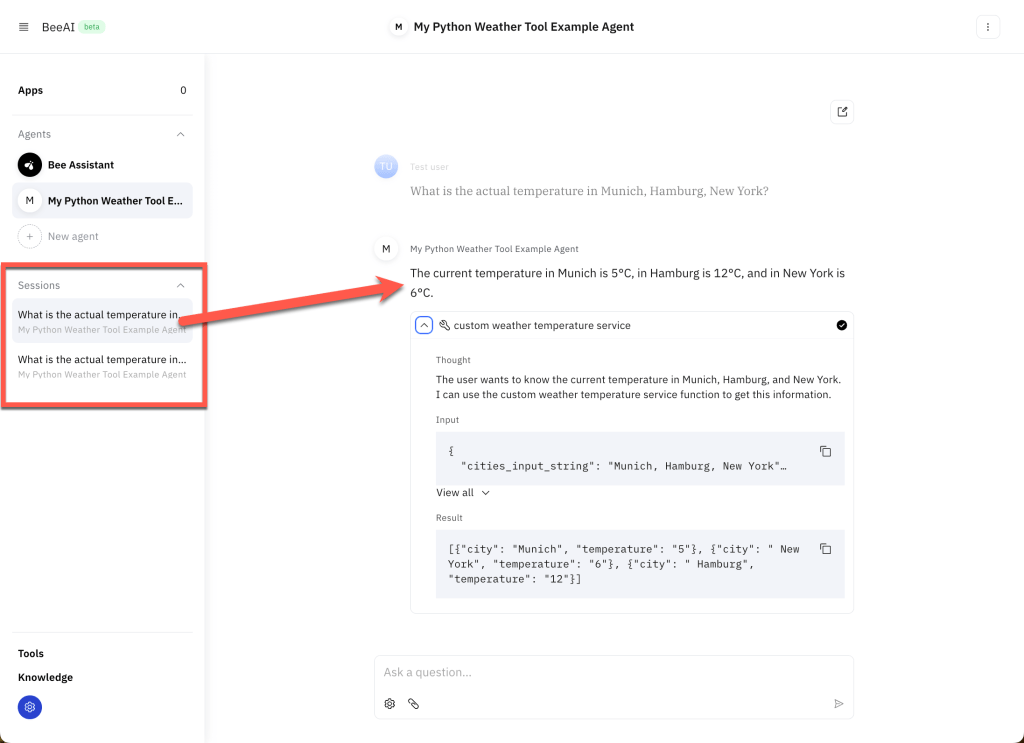
That means we can moving on with our interaction from a session.
4. Generate an app
Inside the Bee UI, you have the option to generate an app and I tried it, by asking the question:
I want to build a nice looking UI
As a result, I got a source code for a Document Summarizer APP, I haven’t verified yet.


My app didn’t work directly at the start, but this is an awesome starting point for developing small applications later.
5. Summary
Adding simple Python tools is a straightforward way to add a custom tool, showing that the TypeScript tool’s intention is on the system level.
As we have seen, writing a clear description of the tool is critical for an agent. Yes, in the end, it is all about creating the right prompt for the model and using the right model parameters how to react to a prompt input.
In addition, the possibility of working with sessions where you can start again directly where you have been is also an incredible possibility for interactions with agents very flexible.
I have noticed that the new app builder functionality combines the power of tools agents to create apps in the future.
So, we definitely need to keep track of what IBM research is building inside the entire bee project.
I hope this was useful to you and let’s see what’s next?
Greetings,
Thomas
#watsonx, #ai, #ibm, #agents, #ai, #beagentframework, #beagent, #aiagents, #beeui, #beestack, #containers, #beeai, #python
