

In this blog post we will look at the steps we need to do, when we use IBM Cloud Schematics service with Terraform to instantiate a Red Hat OpenShift cluster in a “Multizone VPC IBM Cloud environment”.
When we use the IBM Cloud Schematics service we easily can handle Infrastructure as Code to instantiate and delete resources on IBM Cloud, and by the way the IBM Cloud Schematics service is free of charge on IBM Cloud. The service can also be seen as “Terraform as a service” on IBM Cloud, for more details please visit What is Schematics?
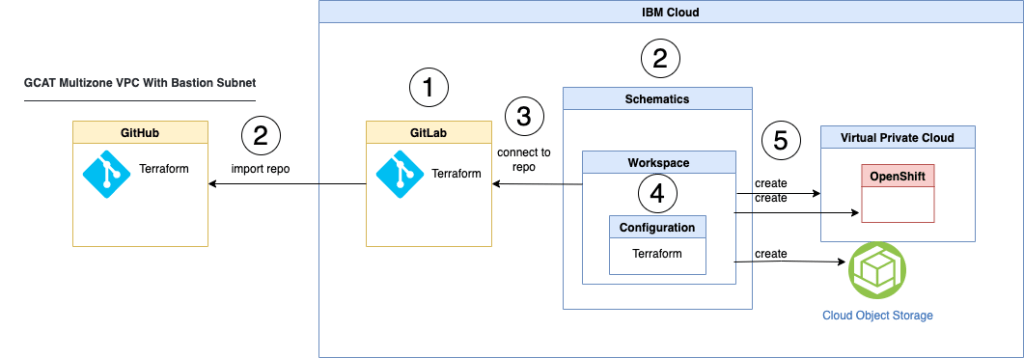
The IBM Cloud resources definitions for the Infrastructure as Code are handled with Terraform , we will use as an example the OpenSource (Apache License) GitHub project provided by IBM called “GCAT Multizone VPC With Bastion Subnet”. For the details of the “Multizone VPC architecture” layout, please get familiar with the content of that project. (Architecture diagram of the GitHub project)
We will focus on the usage of the project template. After when we did the setup of the IBM Cloud Schematics workspace, we can easily instantiate and delete the relevant IBM Cloud resources in the IBM Cloud Schematics service. The diagram below shows the given simplified dependencies.
These are the steps we will follow in a sequence in this blog post:
- Create a GitLab project in IBM Cloud
- Clone the GitHub project to your local computer
- Copy the Terraform source code into the newly create GitLab on IBM Cloud
- Create a Schematics workspace on IBM Cloud
- Create a plan and then apply that plan to instantiate the needed resources on IBM Cloud
Steps
Step 1: Create a GitLab project in IBM Cloud
Therefor you can follow the cheat sheet I created some times ago: Example usage of the internal IBM Cloud GitLab instance
Step 2: Clone the GitHub project to your local computer
git clone https://github.com/Cloud-Schematics/gcat-vpc-bastion-openshift-cluster.git
Step 3: Copy the Terraform source code into the newly create GitLab on IBM Cloud
Clone your newly created GitLab project to your local computer.
Example command:
git clone git@eu-de.git.cloud.ibm.com:thomas.suedbroecker/schematics-openshift-vpc.git
Ensure you did setup the GitLab integration with the ssh-key properly. You can look into a cheat sheet I created that is called: Create a ssh key for your GitLab project on IBM Cloud to verify your setup.
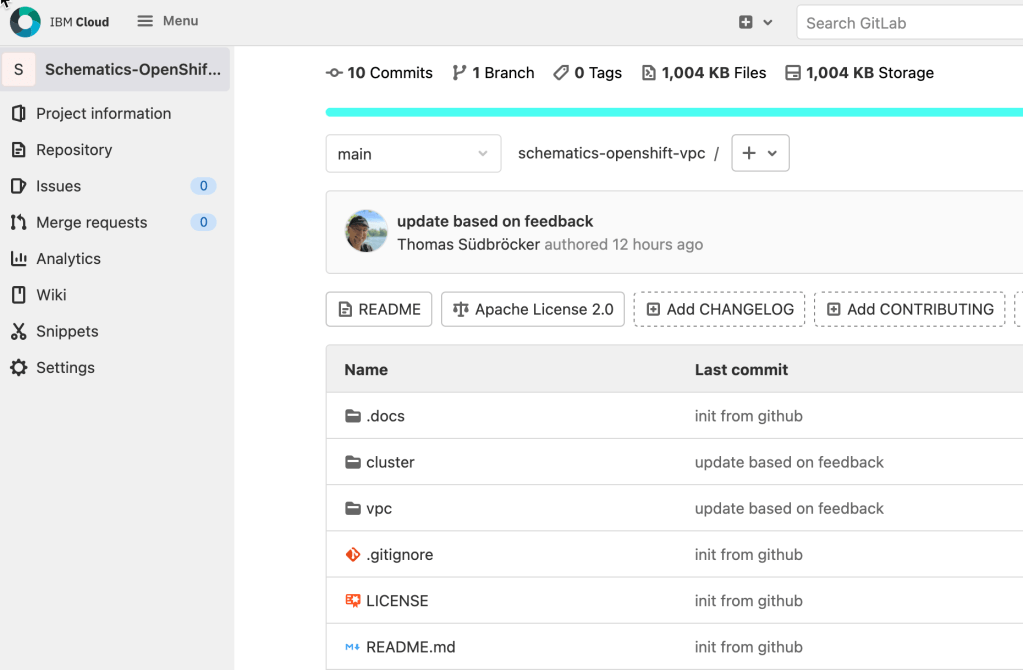
- Here is my example project on IBM Cloud GitLab
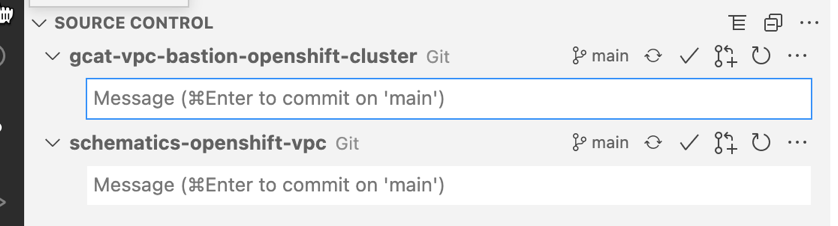
Here you see an example setup in a Visual Studio Code workspace for the two given projects.
- The two projects

- Here is an example usage of an integration to GitHub and GitLab repositories at the same time in Visual Studio Code on my local computer.
Step 4: Create a Schematics workspace on IBM Cloud
1) OPEN FOLLOWING LINK AND PRESS CREATE WORKSPACE
https://cloud.ibm.com/schematics/workspaces
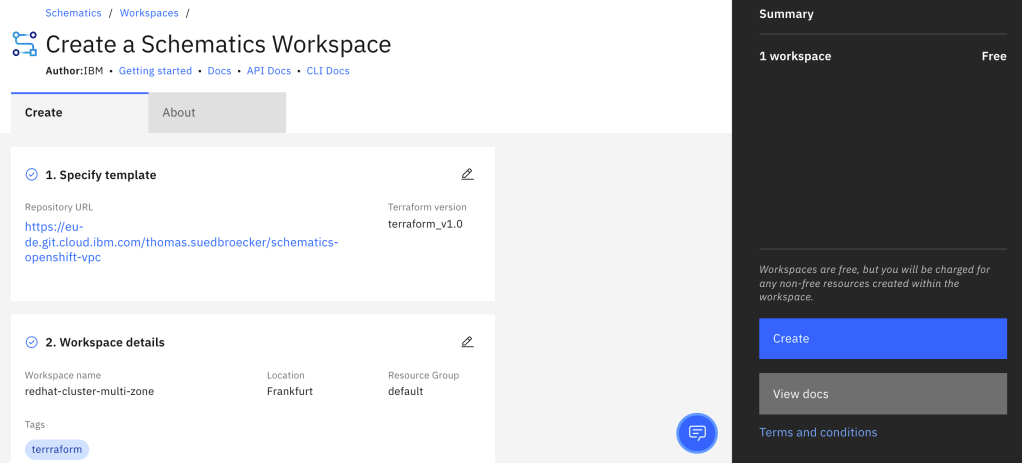
2) ENTER FOLLOWING NEEDED VALUES
- Specify template:
Use existing template - GitHub link:
Your newly create repository in GitLab on IBM Cloud - Provide a personal access token:
your access token - Terraform version:
terraform_v1.0
The image shows example values for the workspace in the first step.

4) CREATE AN ACCESS TOKEN FOR YOUR GITLAB PROJECT.
Open following link. Create and copy the access token.
https://eu-de.git.cloud.ibm.com/-/profile/personal_access_tokens
5) PRESS NEXT in the workspace creation
6) CONFIGURE THE WORKSPACE DETAILS
These are example values:
- Workspace name:
redhat-cluster-multi-zone - Tags:
terraform - Resource group:
default - Location:
Frankfurt
The image displays some example values.

7) PRESS NEXT, VERIFY YOUR CONFIGURATION AND PRESS CREATE
The image contains my example values:
8) VERIFY THE WORKSPACE WAS CREATED SUCCESS FULLY

9) NOW SELECT SETTINGS AND VERIFY THE VARIABLES WHICH WERE EXTRACTED FROM THE TERRAFORM CODE OF THE COPIED TEMPLATE.
- Settings

- Variables

10) WE NEED TO CREATE AN IBM CLOUD API KEY
To enable our Terraform to run the automated creation of IBM Cloud resources, we need to ensure we have the required IAM access rights for our IBM Cloud account to do this. (for more details please visit the IBM Cloud documentation)
Open following link and press Create an IBM Cloud API key and save the key.
https://cloud.ibm.com/iam/apikeys
11) APPLY THE NEWLY CREATED IBM CLOUD API KEY TO A VARIABLE TO THE TERRAFROM VARIABLES OF OUR CONFIGURATION
The following gif shows that you can select and set the given Terraform variable ibmcloud_api_key provided by our Terraform code template. You can also mark the value sensitive, which means “The variable value is not displayed in your workspace details after it is stored.” (source tooltip)
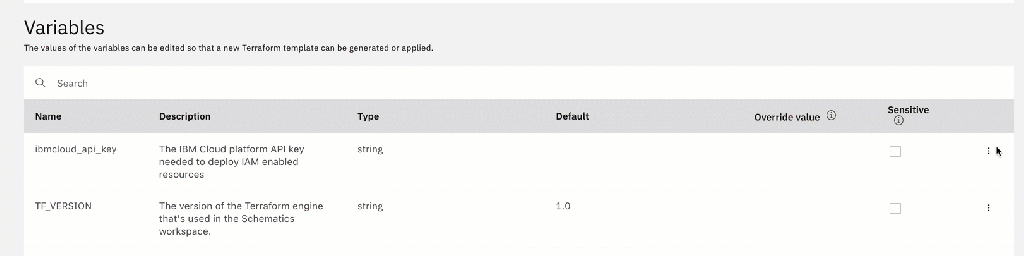
In the image you see that sensitive data is stored on the server:

Step 5: Create a plan and then apply that plan to instantiate the needed resources on IBM Cloud
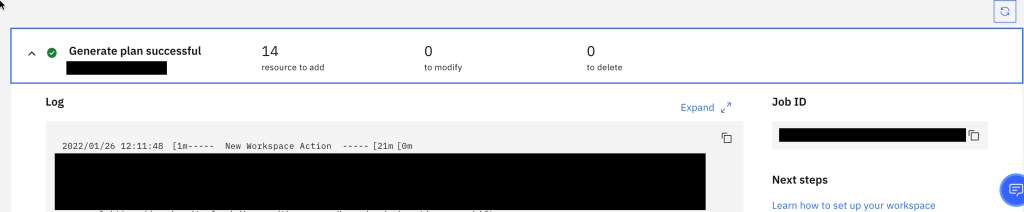
- Create a plan
Now we create a plan by just pressing Generate plan. We will apply the created plan later to create the IBM Cloud resources.

- Verify the log for the newly created plan. Maybe you will get an error and you need to reconfigure variables for example to set the right IBM Cloud resource group.
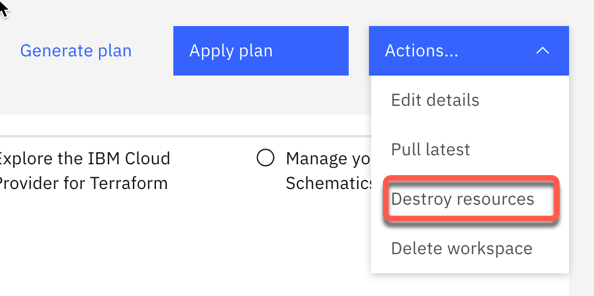
- Apply the plan
Now you can apply the plan. Maybe you want to check before you apply that plan: Are these the right IBM Cloud resources for your architecture and are the cost covered for the instances of the resources which will be created when you execute that plan?
- Delete existing resources
Now it is very easy to delete the created IBM Cloud resources.
Summary
I like Schematics, because it simplifies the usage of Terraform to manage IBM Cloud resources. There are several templates available to get started with the creation of IBM Cloud resources. One of the resources for such templates is following GitHub link https://github.com/Cloud-Schematics.
Additional useful resources
- What is Schematics?
- Useful YouTube link “Automate Provisioning of IBM Cloud Satellite Locations Using Schematics”
- Get started using the IBM Cloud documentation
- Reuse of the “GCAT Multizone VPC With Bastion Subnet” project
- Upgrade Terraform version in Schematics workspace
- IBM Cloud documentation “Creating an IBM Cloud Kubernetes Service cluster on VPC infrastructure with IBM Cloud Schematics”
I hope this was useful for you and let’s see what’s next?
Greetings,
Thomas
#ibmcloud , #gitlab, #schematics, #terrraform
