

Get ready to use the Agent Development Kit (ADK) to Build AI Agents in the watsonx Orchestrate Developer Edition (on GitHub). This powerful platform allows you to build and run AI agents locally. In my previous post, I showed how to reuse an existing agent from watsonx.ai Agent Lab in watsonx Orchestrate. Today, let’s take it a step further: we’ll use the Agent Development Kit (ADK) to build and run agents locally in the watsonx Orchestrate Developer Edition, rather than watsonx Orchestrate in IBM Cloud.
🎯 Our objective is to install the ADK and load the Customer Care Planner agent example, preparing us to explore the Agent Developer Kit (ADK). Optional: inspect how the Langfuse observability can be integrated.
Here is a preview of what we will achieve.
- The Local usage feels like the same as in watsonx Orchestrate on IBM Cloud.

- We can inspect the observability with Langfuse from many views

When we are going to start with watsonx Orchestrate. We can use a trial watsonx Orchestrate instance in our IBM Cloud account. We can use the ADK (Agent Developer Kit) with watsonx Orchestrate Developer Edition locally to build agents and tools on our local machine in combination with watsonx.ai as we will see.
Table of contents
- 🎯 Architecture overview
- 🔧 Prerequisites & Resources
- ✅ Step-by-Step Installation
- 🚀 Launch the orchestrate server
- Import the Example Agent: Customer Care Planner
- 📤 Export agents or tools
- 🧪 Summary
🎯 Architecture overview
We will use in this example setup for the ADK the local configuration to access watsonx.ai, rather than the option to connect to a remote watsonx Orchestrate instance on IBM Cloud (that would need a different configuration in the .env file).
These are the main components.
- watsonx Orchestrate Agent Developer Kit (ADK)
- watsonx Orchestrate Developer Edition
- Running in a container engine with docker compose
- Import examples from the local machine
- Running in a container engine with docker compose
- IBM Cloud:
- Access to IBM Cloud Container Registry with all needed Container images to run it in the Docker Compose instance. To access these containers you need an entitlement key.
- watsonx Runtime: connected to a deployment space in watsonx.ai to get access to the models running in watsonx.ai.
The image below illustrates a simplified architecture that shows the dependencies used in this example. Using ADK the local configuration to access watsonx.ai and not remote watsonx Orchestrate instance on IBM Cloud.

🔧 Prerequisites & Resources
- Agent Development Kit for watsonx Orchestrate – GitHub repository
- Example projects: Example projects in the ADK GitHub repository
- Official installation guide: IBM Developer watsonx-orchestrate documentation for the installation and setup
- Rancher/Colima settings: recommended Docker config for ADK – Rancher settings
- Agent-Orchestrate integration: Connecting AI Agents to IBM watsonx Orchestrate
- Observability (optional): Langfuse integration
✅ Step-by-Step Installation
1.1 Verify System Requirements
Check IBM’s documentation to ensure your local machine meets the prerequisites. You’ll need:
- Python 3.11–3.13
- Docker engine (e.g., Rancher or Colima)
- At least 16 GB RAM, 8 cores, 25 GB free disk space
1.2 Set Up Python Virtual Environment and install the ADK
Visit the prerequisites for your local machine on the IBM watsonx Orchestrate documentation.
mkdir adk_watsonx_orchestrate
cd adk_watsonx_orchestrate
python3.12 -m venv .venv
source ./.venv/bin/activate
python3 -m pip install ibm-watsonx-orchestrate (--upgrade)
python3 -m pip install --upgrade pip
Upgrade the ADK when needed:
python3 -m pip install --upgrade ibm-watsonx-orchestrate
1.3 Obtain IBM Entitlement Key
Generate your entitlement key via MyIBM — this is required to run Developer Edition locally (see IBM setup docs).
- Example screenshot

- Example screenshot of the list of your current keys. Here, you can find the button
Add new keyto get a new one.

1.4 Create watsonx.ai Space & Associate Runtime
We need to set up a deployment space in watsonx.ai and link it to a runtime environment.
Generate a deployment space and get the space id. The space id is needed to connect to the large language models running in watsonx.ai. Visit the IBM documentation for the creation.
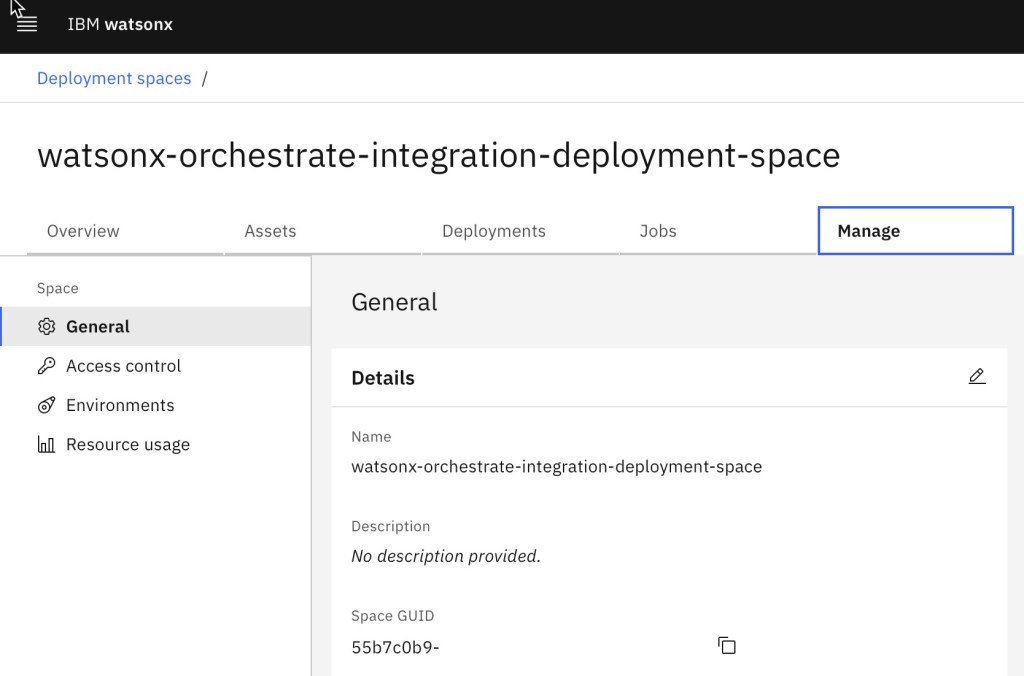
Don’t forget to associate a watsonx Runtime service instance to your watsonx deployment space.

1.5 Generate watsonx API Key
Create an API key in the IBM Cloud console to authenticate agent access to watsonx.ai. IBM Documentation Creating an API key in the console
1.6 Create Your .env File
Note: The variable WO_DEVELOPER_EDITION_SOURCE=myibm displays that you are going to use an entitlement key from MyIBM.
WO_DEVELOPER_EDITION_SOURCE=myibm
WO_ENTITLEMENT_KEY=<YOUR_ENTITLEMENT_KEY>
WATSONX_APIKEY=<YOUR_WATSONX_API_KEY>
WATSONX_SPACE_ID=<YOUR_SPACE_ID>
1.7 Start Docker with Proper Settings
Use Rancher or Colima configured per the ADK’s Docker recommendations.
My selection for the container runtime was Rancher, and ensure that you follow the Rancher settings in the IBM documentation.
🚀 Launch the orchestrate Server
You can start the orchestration server and optionally enable observability. For observability, the necessary Langfuse container and an initial working configuration will be provided by the watsonx Orchestrate Developer Edition.
2.1 Start the Orchestrate Server
source .env
orchestrate server start --env-file .env
Look for:
[INFO] - Orchestrate services initialized successfully<br>[INFO] - local tenant found
2.2 Add Langfuse Observability (Optional)
We can access the Langfuse UI at http://localhost:3010 (user: orchestrate@ibm.com, pass: orchestrate) and visit the Watsonx Orchestrate Lite Project to inspect details.
orchestrate server start --env-file .env --with-langfuse
- Example output:
[INFO] - local tenant found
[INFO] - You can run `orchestrate env activate local` to set your environment or `orchestrate chat start` to start the UI service and begin chatting.
[INFO] - You can access the observability platform Langfuse at http://localhost:3010, username: orchestrate@ibm.com, password: orchestrate
- Optional: Ensure the local environment is activated
orchestrate env activate -n local
The gif below shows an example of how we can observe the invocation of an agent in watsonx orchestrate.

2.3. Launch the Chat UI
orchestrate chat start
Initially, you’ll see:
orchestrate chat start
[INFO] - local tenant found
[ERROR] - No agents found for the current environment. Please create an agent before starting the chat.
That’s expected—no agents loaded yet.
📥 Import the Example Agent: Customer Care Planner
We will import the agent using the bash automation available in the example from the git repository.
The automation includes following command for the import (orchestrate agents import):
for agent in customer_care_agent.yaml; do
  orchestrate agents import -f ${SCRIPT_DIR}/agents/${agent}
done
3.1. Clone the ADK Examples
We can find examples for various use cases with the related agents and tools on GitHub.

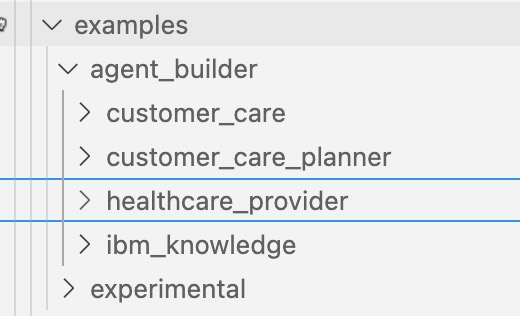
git clone https://github.com/IBM/ibm-watsonx-orchestrate-adk.git
cd ibm-watsonx-orchestrate-adk/examples/agent_builder/customer_care_planner
tree ./
Now we should see examples for agent configurations and tools implementation with Python:
./
├── agents
│ └── customer_care_agent.yaml
├── import-all.sh
├── readme.md
└── tools
├── customer_care
│ ├── format_task_results.py
│ ├── get_healthcare_benefits.py
│ ├── get_my_claims.py
│ └── search_healthcare_providers.py
└── requirements.txt
4 directories, 8 files
3.2. Ensure that watsonx Orchstrate is running by inspecting the server logs
orchestrate server logs
- Example output:
wxo-server-worker-1              | [2025-06-24 10:08:59,372: INFO/MainProcess : HTTP Request: GET https://us-south.ml.cloud.ibm.com/ml/v1/foundation_model_specs?version=2025-04-02&filters=function_text_generation%2C%21lifecycle_withdrawn%3Aand&limit=200 "HTTP/1.1 200 OK"]
wxo-server-worker-1              | 2025-06-24 10:08:59,372 INFO httpx [Worker PID: 1] [MainThread : 140737470531392] [Task ID: <no-id>]  HTTP Request: GET https://us-south.ml.cloud.ibm.com/ml/v1/foundation_model_specs?version=2025-04-02&filters=function_text_generation%2C%21lifecycle_withdrawn%3Aand&limit=200 "HTTP/1.1 200 OK"
3.3. Import the Example Agent & Tools
bash import-all.sh
You’ll see logs like:
...
[INFO] - Tool 'get_healthcare_benefits' imported successfully
...
[INFO] - Agent 'customer_care_agent' imported successfully
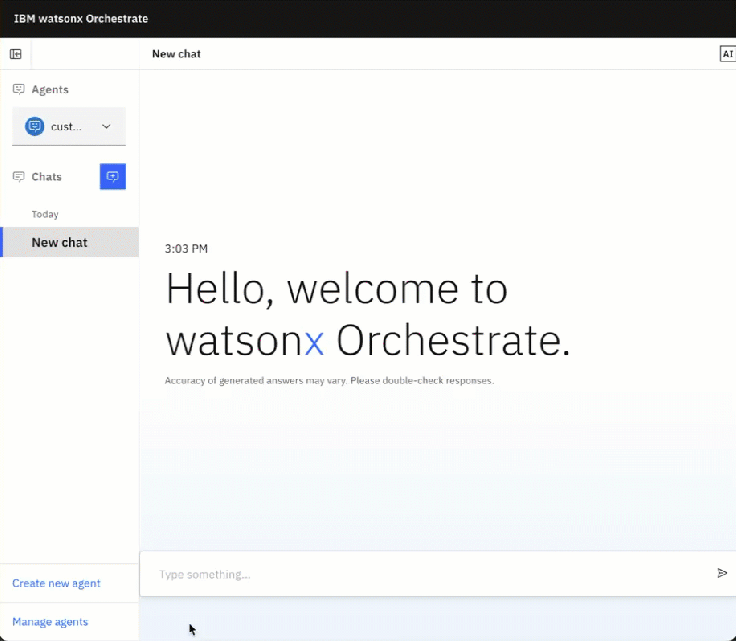
3.4. Start the Chat UI Again
orchestrate chat start
Now the Chat UI should be available at:
http://localhost:3000/chat-lite
- Example output:
...
 ✔ Container docker-ui-1  Started                                                                                                                        0.3s
[INFO] - Chat UI Service started successfully.
[INFO] - Waiting for UI component to be initialized...
[INFO] - Opening chat interface at http://localhost:3000/chat-lite
You can interact with the Customer Care Planner agent directly.
📤 Export agents or tools
If we want to export our changes or newly developed tools or agents we can use the command-line: (export in the documentation)
orchestrate agents list --verbose
export AGENT="customer_care_agent"
# 'native', 'external', 'assistant'.
export AGENT_TYPE="native"
orchestrate agents export -n ${AGENT} -k ${AGENT_TYPE} -o ./${AGENT}.yml --agent-only
- Example output:
[INFO] - Exported agent definition for 'customer_care_agent' to './customer_care_agent.yml'
- Example content:
kind: native
name: customer_care_agent
display_name: customer_care_agent
description: 'You are an agent who specializes in customer care for a large healthcare
  institution. You should be compassionate to the user.

  You are able to answer questions around benefits provided by different plans, the
  status of a claim, and are able to help direct people to the nearest provider for
  a particular ailment.

  '
llm: watsonx/meta-llama/llama-3-2-90b-vision-instruct
style: planner
custom_join_tool: format_task_results
instructions: 'Use the search_healthcare_providers tool to search for providers. If
  more than 1 is returned format as a github formatted markdown table. Otherwise simply
  return the output in a kind conversational tone. Do not expand speciality acronyms.

  Use the get_healthcare_benefits tool to fetch the benefits coverage for a particular
  ailment, or for generic plan  comparisons. Respond to get_healthcare_benefits requests
  in a github style formatted markdown table. Be specific about the expected coverage
  type if a particular condition is mentioned.

  Use the get_my_claims tool to fetch your open medical claims. Make sure to respond
  in a direct tone and  do not negotiate prices. Format the output of get_my_claims
  as a github style markdown table.

  '
collaborators: []
tools:
- search_healthcare_providers
- get_healthcare_benefits
- get_my_claims
knowledge_base: []
spec_version: v1
🧪 Summary
We’ve now:
- Set up ADK locally
- Deployed watsonx Orchestrate Developer Edition
- Loaded and tested a real-world agent (Customer Care Planner)
- Optional: integrated observability via Langfuse
We reached our Objective to install the ADK and load the Customer Care Planner agent example, ready to play around with the Agent Developer Kit (ADK).
That is our foundation for building, testing, iterating—and scaling—AI agents locally before moving to production these will be topics future blog posts.
I hope this was useful to you and let’s see what’s next?
Greetings,
Thomas
PS: You can easily import an agent with this command:
export AGENT="MY_AGENT_FILE_NAME.yml"
orchestrate agents import -f ${AGENT}
#watsonxorchestrate, #watsonx, #agentdeveloperkit, #ADK, #aiagents, #agentorchestration, #developeredition, #langfuse, #observability, #ai

Very helpfull.
LikeLike