
This blog post contains some of the implementation details of an example Bash script to automate the setup for an IBM Cloud App ID service instance. For details, visit this GitHub project.
What is App ID?
“IBM Cloud App ID allows you to easily add authentication to web and mobile apps. You no longer have to worry about setting up infrastructure for identity, ensuring geo-availability, and confirming compliance regulations. Instead, you can enhance your apps with advanced security capabilities like multifactor authentication and single sign-on.” Resource from the IBM Cloud App ID website (2021/10/06). For more details please visit the website.
The Bash script utilises following APIs and CLIs:
The script creates one instance of the IBM Cloud App ID service and does the configuration.
This automation example uses the IBM Cloud Shell and a PayAsYouGo IBM Cloud Account, but for the App ID service instance we will use the lite plan which is for free.
Please see the official documentation for each IBM Cloud Service and IBM Cloud Account type definition, before you start.
Simplified overview of steps to setup an example using the Bash script:
- Create a
PayAsYouGoIBM Cloud Account - Open the IBM Cloud shell
- Clone the GitHub project
- Execute one Bash script
- Verify the newly created App ID service instance in IBM Cloud:
- Cloud directory as identity provider enabled
- Application
- Scope
- Roles
- Users
- Login headline
- Color
Here are the steps you can follow to execute the example Bash script
Step 1: Create a PayAsYouGo IBM Cloud Account
Open this link and follow the guided steps to create the IBM Cloud Account.
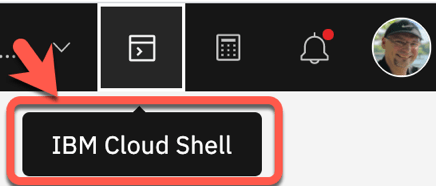
Step 2: Open the IBM Cloud Shell
When using the IBM Cloud Shell, no client-side setup is required for this example setup, it comes with all necessary CLIs (command line tools).
Use following link to directly open the IBM Cloud Shell.
In your browser, login to the IBM Cloud Dashboard and open the IBM Cloud Shell from here:
Note: Your workspace includes 500 MB of temporary storage. This session will close after an hour of inactivity. If you don’t have any active sessions for an hour or you reach the 50-hour weekly usage limit, your workspace data is removed.
Step 2: Verify the open IBM Cloud Shell
Now you are logged on with your IBM Cloud account.

Step 3: Clone the github project into the IBM Cloud Shell
git clone https://github.com/thomassuedbroecker/automated-setup-of-ibmcloud-appid
Step 4: Navigate to the scripts directory of the GitHub project
cd automated-setup-of-ibmcloud-appid/scripts
Step 5: Execute the Bash script setup-appid.sh
bash setup-appid.sh
Step 6: Verify the created App ID service instance
What happens behind the curtain?
Here is some background information what the script does. The Bash script uses cURL, sed and grep commands and the AppID REST API. The steps also include example content in JSON payload format, which will be uploaded. In the GitHub project you find the JSON files I prepared for that example.
Here are some of the configured values:
- Application name:
myexamplefrontend - Role name:
tenant_user_access - Scope name:
tenant_scope - User:
thomas@example.comwith passwordthomas4appid
Use of the IBM Cloud CLI to create a service instance and service key
Step 1: Configure region and resource group
ibmcloud target -g $RESOURCE_GROUP
ibmcloud target -r $REGION
Step 2: Creates an App ID service instance
For that task it uses the IBM Cloud CLI using ibmcloud resource service-instance-create.
ibmcloud resource service-instance-create $YOUR_SERVICE_FOR_APPID $APPID_SERVICE_NAME $SERVICE_PLAN $REGION
Step 3: Create a service key for the AppID service instance
The service key contains needed configuration and access information we need to configure the service.
ibmcloud resource service-key-create $APPID_SERVICE_KEY_NAME $APPID_SERVICE_KEY_ROLE --instance-name $YOUR_SERVICE_FOR_APPID
Use the App ID REST API using cURL
Now we do the configuration of identity providers, application, scope, role and an import existing user and more for our App ID service instance. Before the script executes each of the cURL commands for the App ID REST API, we need to make sure we have a valid oAuth token, we get this oAuth token using the IBM IAM.
Step 1: Set identity providers
Deactivate Google, Custom and Facebook as identity providers.
OAUTHTOKEN=$(ibmcloud iam oauth-tokens | awk '{print $4;}')
result=$(curl -d @./idps-custom.json -X PUT -H "Content-Type: application/json" -H "Authorization: Bearer $OAUTHTOKEN" $MANAGEMENTURL/config/idps/custom)
The files do contain following format.
{
    "isActive": false
}
Format to enable Cloud Directory as identity provider.
{
  "isActive": true,
  "config": {
    "selfServiceEnabled": true,
    "signupEnabled": true,
    "interactions": {
      "identityConfirmation": {
        "accessMode": "FULL",
        "methods": [
          "email"
        ]
      },
      "welcomeEnabled": false,
      "resetPasswordEnabled": false,
      "resetPasswordNotificationEnable": true
    },
    "identityField": "email"
  }
}
Step 2: Create application
OAUTHTOKEN=$(ibmcloud iam oauth-tokens | awk '{print $4;}')
result=$(curl -d @./$ADD_APPLICATION -H "Content-Type: application/json" -H "Authorization: Bearer $OAUTHTOKEN" $MANAGEMENTURL/applications)
Format to upload an application
{
    "name": "cns-ce-example",
    "type": "singlepageapp"
}
Step 3: Add scope
OAUTHTOKEN=$(ibmcloud iam oauth-tokens | awk '{print $4;}')
result=$(curl -d @./$ADD_SCOPE -H "Content-Type: application/json" -X PUT -H "Authorization: Bearer $OAUTHTOKEN" $MANAGEMENTURL/applications/$APPLICATION_CLIENTID/scopes)
Format to upload the scope.
{
  "scopes": [
    "cns_example_scope"
  ]
}
Step 4: Add role
#Create file from template
sed "s+APPLICATIONID+$APPLICATION_CLIENTID+g" ./add-roles-template.json > ./$ADD_ROLE
OAUTHTOKEN=$(ibmcloud iam oauth-tokens | awk '{print $4;}')
#echo $OAUTHTOKEN
result=$(curl -d @./$ADD_ROLE -H "Content-Type: application/json" -X POST -H "Authorization: Bearer $OAUTHTOKEN" $MANAGEMENTURL/roles)
Format to upload a role.
{
  "name": "ce_user_access",
  "description": "This is an example role.",
  "access": [
    {
      "application_id": "APPLICATIONID",
      "scopes": [
        "cns_example_scope"
      ]
    }
  ]
}
Step 5: Import users
result=$(curl -d @./$USER_IMPORT_FILE -H "Content-Type: application/json" -X POST -H "Authorization: Bearer $OAUTHTOKEN" $MANAGEMENTURL/cloud_directory/import?encryption_secret=$ENCRYPTION_SECRET)
Format of an exported user, which the Bash script does import.
{"itemsPerPage":1,"totalResults":1,"users":[{"scimUser":{"originalId":"7cdf7ac3-371f-4b4c-8d0a-81e479ab449b","name":{"givenName":"Thomas","familyName":"Example","formatted":"Thomas Example"},"displayName":"Thomas Example","active":true,"emails":[{"value":"thomas@example.com","primary":true}],"passwordHistory":[{"passwordHash":"L6EEYnQANBPSBF0tDCPDZl4uVD07H3Ur8qIVynB1Ht4Bn4s/x0lA6kvyJxEPr/06m5hi5wdLM45JtYDlT8M0hjVIBI3YpXRR9J4oXZA/Yt/V13yjsUPsXKek6RWdOKWp+wuD5w3Bobh43QbRR3dXFoKUbcLVWQoKLWqvRATMQis=","hashAlgorithm":"PBKDF2WithHmacSHA512"}],"status":"CONFIRMED","passwordExpirationTimestamp":0,"passwordUpdatedTimestamp":0,"mfaContext":{}},"passwordHash":"L6EEYnQANBPSBF0tDCPDZl4uVD07H3Ur8qIVynB1Ht4Bn4s/x0lA6kvyJxEPr/06m5hi5wdLM45JtYDlT8M0hjVIBI3YpXRR9J4oXZA/Yt/V13yjsUPsXKek6RWdOKWp+wuD5w3Bobh43QbRR3dXFoKUbcLVWQoKLWqvRATMQis=","passwordHashAlg":"PBKDF2WithHmacSHA512","profile":{"attributes":{}},"roles":["ce_user_access"]}]}
Step 6: Add redirect URLs
OAUTHTOKEN=$(ibmcloud iam oauth-tokens | awk '{print $4;}')
result=$(curl -d @./$ADD_REDIRECT_URIS -H "Content-Type: application/json" -X PUT -H "Authorization: Bearer $OAUTHTOKEN" $MANAGEMENTURL/config/redirect_uris)
{
    "redirectUris": [
      "http://localhost:8080/*",
      "APPLICATION_REDIRECT_URL/*"
    ],
    "additionalProp1": {}
}
Summany
The combination of the AppID REST API, IBM Cloud CLI, cURL, Bash, sed and grep gives us all we need to create a full automated way to setup the service instance and service configuration without any user interaction.
I hope this was useful for you and let’s see what’s next?
Greetings,
Thomas
#appid, #ibmcloud, #bash, #automation, #security

Leave a comment