
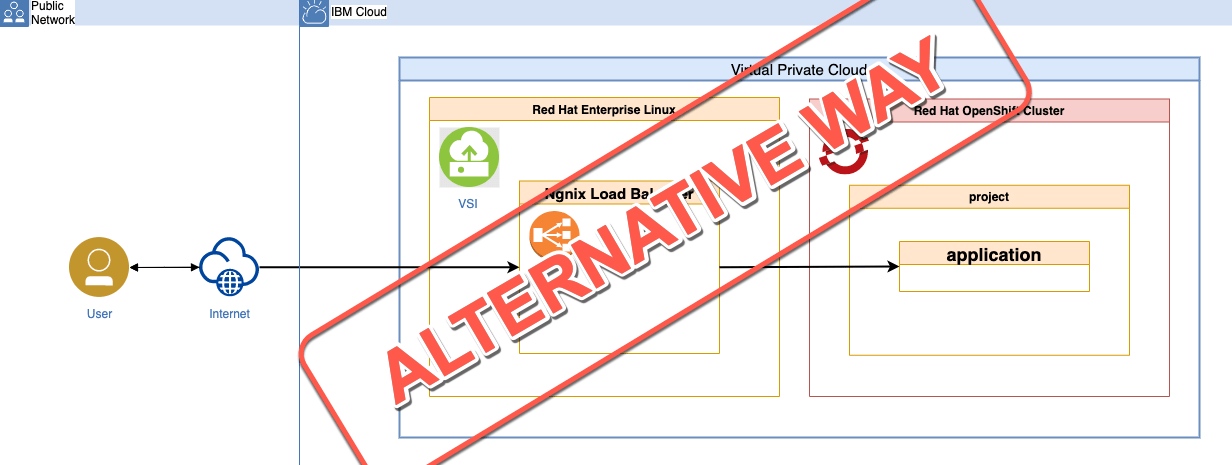
This blog post shows an alternative way to access the example application with the Ngnix load balancer on the Virtual Service Instance (VSI) from the last blog post titled Use a Ngnix load balancer on a VSI to access an application on OpenShift in VPC.
The next steps do expect you already did the setup of the previous example.
In this alternative way, we use the worker node IP addresses and the node port of the service we created for your example application on Red Hat OpenShift.
In this blog post we don’t want to discuss:
- Is this a good setup?
- What could be a motivation to setup such scenario?
Architecture
The simplified architecture diagram shows that we are accessing the example directly using the worker node IP addresses and the node port of the service we created.
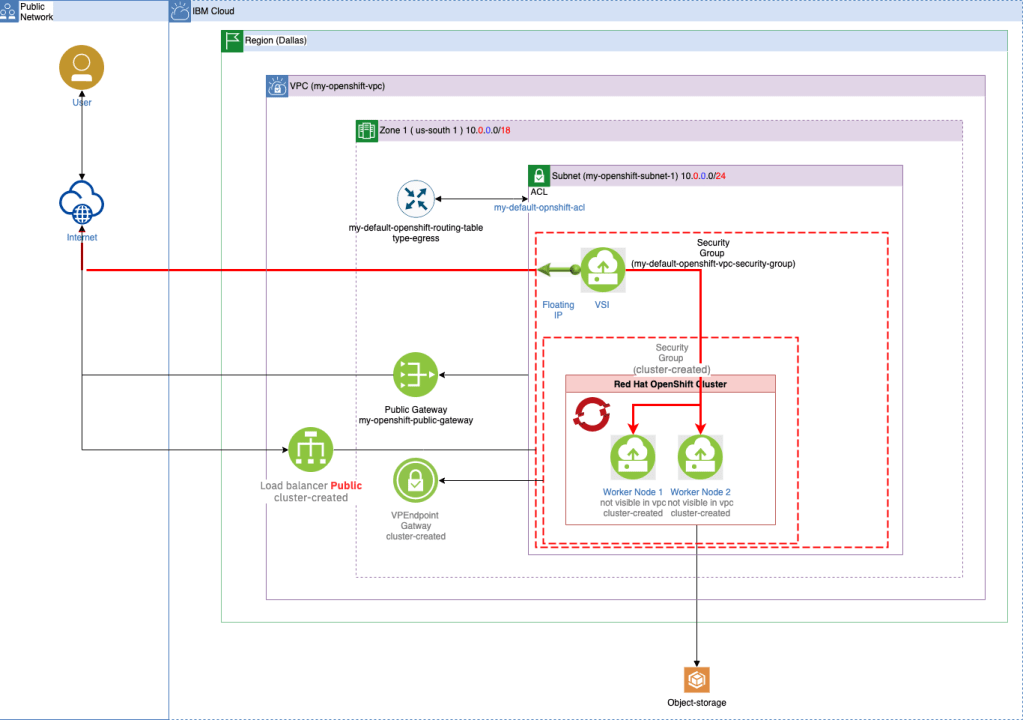
The lines marked in red show the call sequence from the end point in the Internet with the floating IP address of the VSI to the running application within the OpenShift cluster.
The extract of ngnix.conf file shows a configuration for the upstream server in Nginx. In this configuration we use two worker nodes IP addresses and the node port of the application service in OpenShift.
    upstream vend {
        server [WORKERNODE_IP_1]:[NODE_PORT_SERVICE_FOR_APPLICATION] weight=2;
        server [WORKERNODE_IP_2]:[NODE_PORT_SERVICE_FOR_APPLICATION] weight=1;
    }
Verify the existing service specification for our application
That is the service specification, that we created when we deployed the sample application in the last blog post. (service.yaml on GitHub) The existing service specification for our example application has the type NodePort.
kind: Service
apiVersion: v1
metadata:
  name: vend-service
  labels:
    app: vend-app
spec:
  selector:
    app: vend-app
  ports:
    - port: 8080
      name: http
  type: NodePort
Check out the alternative way
Let’s check out the alternative route. I didn’t create bash script automation for this alternate path.
We need to open two terminals:
- The first terminal has access to the
IBM Cloudand theRed Hat OpenShiftcluster. - The second terminal has access to the
VSIwith theNginx load balancer.
We divide the next main tasks in three sections.
- Get the worker node IP addresses and the node port of the service. (First terminal)
- Test if the access to example application that is running on our OpenShift cluster is possible and update the
/etc/nginx/nginx.conffile. (Second terminal) - Verify the setup (First terminal)
1. Get the worker node IP addresses and the node port of the service. (First terminal)
In the next steps with will get the worker node IP addresses and the node port of our service.
Step 1.1: Get services
Let’s get the services of our project.
oc get services -n vend-sec
Example output:
NAME                TYPE       CLUSTER-IP       EXTERNAL-IP   PORT(S)          AGE
vend-service        NodePort   172.21.241.221   <none>        8080:32097/TCP   21m
Step 1.2: Get the worker IP addresses
export CLUSTER_NAME=YOUR_CLUSTER_NAME
ibmcloud oc workers --cluster $CLUSTER_NAME
ID                                                       Primary IP    Flavor     State    Status   Zone         Version
kube-c6pnqhfd0ov0rkvcgie  10.240.0.15   bx2.4x16   normal   Ready    us-south-1   4.8.22_1538_openshift
kube-c6pnqhfd0ov0rkvcgie  10.240.0.16   bx2.4x16   normal   Ready
Step 1.3: Get one worker IP address
export CLUSTER_NAME=YOUR_CLUSTER_NAME
export WORKER_NODE_IP=$(ibmcloud oc workers --cluster $CLUSTER_NAME  | grep "Ready" | awk '{print $2;}' | head -n 1)
echo $WORKER_NODE_IP
Example output:
10.240.0.15
Step 1.4: Get the node port of the service
NODEPORT=$(oc get svc vend-service  --ignore-not-found --output 'jsonpath={.spec.ports[*].nodePort}')
echo $NODEPORT
Example output:
32097
Step 1.5: Build an URL to invoke the application from the VSI
echo "Internal URL: http://$WORKER_NODE_IP:$NODEPORT"
Example output:
Internal URL: http://10.240.0.15:32097
2. Test if the access to example application that is running on our OpenShift cluster is possible and update the /etc/nginx/nginx.conf file. (second terminal)
Step 2.1: Access the VSI (we can follow the steps written in the last blog post)
Step 2.2.: Invoke a cURL command with the URL we got
Now we test if it is possible to access the example application.
curl -i http://10.240.0.15:32097
Example output:
[root@YOUR_VSI_MACHINE ~]# curl -i http://10.240.0.15:32097
HTTP/1.1 200 OK
X-Powered-By: Express
Access-Control-Allow-Origin: *
WWW-Authenticate: Basic realm="example"
Content-Type: application/json; charset=utf-8
Content-Length: 65
ETag: W/"41-mJId5GtTq6pvcI+uaySnp04Kvl0"
Date: Mon, 20 Dec 2021 13:32:00 GMT
Connection: keep-alive
Keep-Alive: timeout=5

"{\"message\":\"vend test - vend-load-balancer-demo-openshift\"}"
Step 2.3.: Open the /etc/nginx/nginx.conf
nano /etc/nginx/nginx.conf
Replace the content for the upstream server using the IP addresses, the port and weight configuration.
The server
10.240.0.15(weight=2) in this example will receive more traffic than the server10.240.0.16(weight=1). ( more details for example in this blog post How to set up server weight and HTTPS load balancing with NGINX )
    upstream vend {
        server 10.240.0.15:32097 weight=2;
        server 10.240.0.16:32097 weight=1;
    }
Here is the full example for the nginx.conf file.
error_log /var/log/nginx/error.log;

events {}

http {

    log_format  upstreamlog  '** [$time_local] - $server_name to: $upstream_addr - ["$request"] '
                             '[host: $host] [x-forwarded-host: $server_name] proxy-add [$proxy_add_x_forwarded_for]'
                             '[real ip: $remote_addr] [upgrade: $http_upgrade]';
    upstream vend {
        server 10.240.0.15:32097 weight=2;
        server 10.240.0.16:32097 weight=1;
    }

    access_log  /var/log/nginx/access.log  upstreamlog;

    server {
        listen 80;
        server_name vend;
        location / {
            proxy_redirect off;
            proxy_pass http://vend;
            proxy_http_version 1.1;
            proxy_set_header host $host;
            proxy_set_header x-forwarded-host $hostname;
            proxy_set_header x-forwarded-for $proxy_add_x_forwarded_for;
            proxy_set_header x-real-ip $remote_addr;
            proxy_set_header upgrade $http_upgrade;
            proxy_set_header connection "upgrade";
        }

        location /nginx_status {
          stub_status;
        }
    }
}
- Restart
systemctl is-enabled nginx
systemctl restart nginx
- (Optional) Test the configuration
nginx -t
- (Optional) Inspect the access.log
more /var/log/nginx/access.log
3. Verify the setup (first terminal)
You can open a Safari browser and insert the floating ip address of the VSI.

or just insert following cURl command in a terminal.
curl -i http://YOUR_FLOATING_IP_FOR_THE_VSI
Example output:
TTP/1.1 200 OK
Server: nginx/1.14.1
Date: Sun, 19 Dec 2021 18:11:38 GMT
Content-Type: application/json; charset=utf-8
Content-Length: 65
Connection: keep-alive
X-Powered-By: Express
Access-Control-Allow-Origin: *
WWW-Authenticate: Basic realm="example"
ETag: W/"41-mJId5GtTq6pvcI+uaySnp04Kvl0"
"{\"message\":\"vend test - vend-load-balancer-demo-openshift\"}"
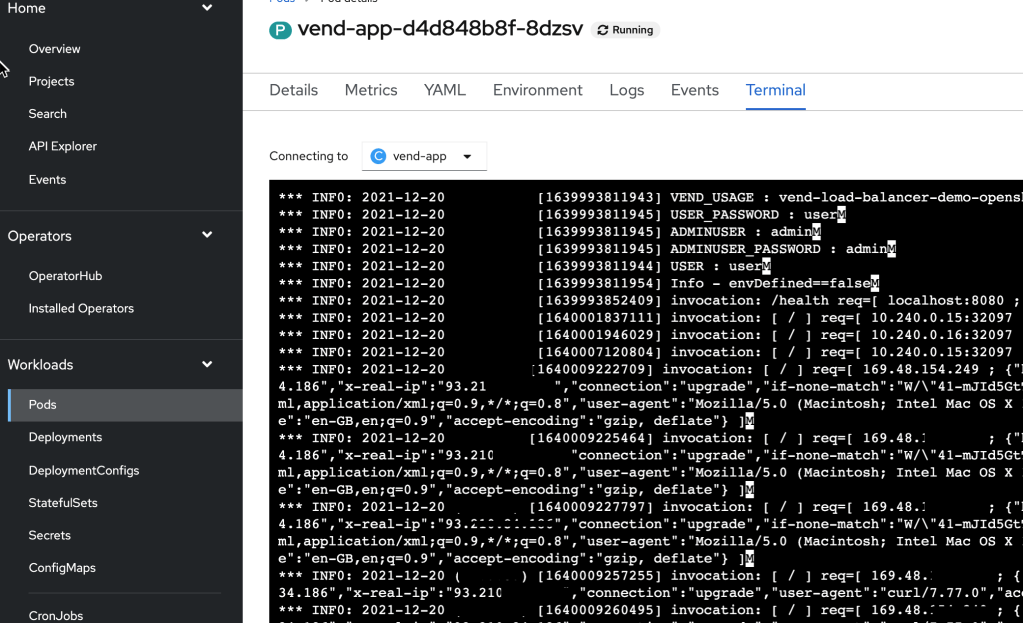
We can open the running container in the pod and verify the log.txt, and see the complete invocation for our application.
Summary
This blog post shows that accessing the application via the worker nodes and with the node port of the associated service of the sample application is also possible.
I hope this was useful to you and let’s see what’s next?
Greetings,
Thomas
#redhat, #openshift, #vsi, #nginx, #vpc, #ibmcloud, #nodejs, #bash, #rhel
