

This cheat sheet is an extension to a blog post I made which is called: Configure a project in an IBM Cloud Red Hat OpenShift cluster to access the IBM Cloud Container Registry . In that related blog post we used the IBM Cloud Container registry to get the container images to run our example application. Now in this cheat sheet we will use the Red Hat OpenShift internal container registry and the Docker build strategy to deploy the same example application to OpenShift.
Therefore we need to define an image stream and a build config. When we had run a build, we can verify our builds in OpenShift.
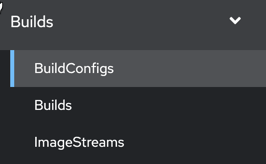
The following image shows the three major topics in the administrator perspective of OpenShift.
Overview of the relevant dependencies
In the diagram below, we see a simplified overview of configurations definitions and their relevant dependencies:

The following list describes the simplified relevant dependencies in the basic overview diagram above. As I said: The diagram shows the different configurations and it’s dependencies, we need to define and apply to the OpenShift cluster:
- Two persistent volume claims to save logs and configurations outside the container.
- Two secrets to secure user and admin data.
- One configmap to map not secured environment variables, which our application needs to know during the execution.
- One deployment to define the desired state for the pod.
- One service to access the right pod.
- One route to access the application from the internet.
- One build-config with the build strategy
Docker. Here will use a Dockerfile and the source code from the GitHub repository for this example application. - One images stream which does define the reference to the created container image inside the Red Hat OpenShift container registry.
Later we will start a build with the predefined build-config that does produce a build output.
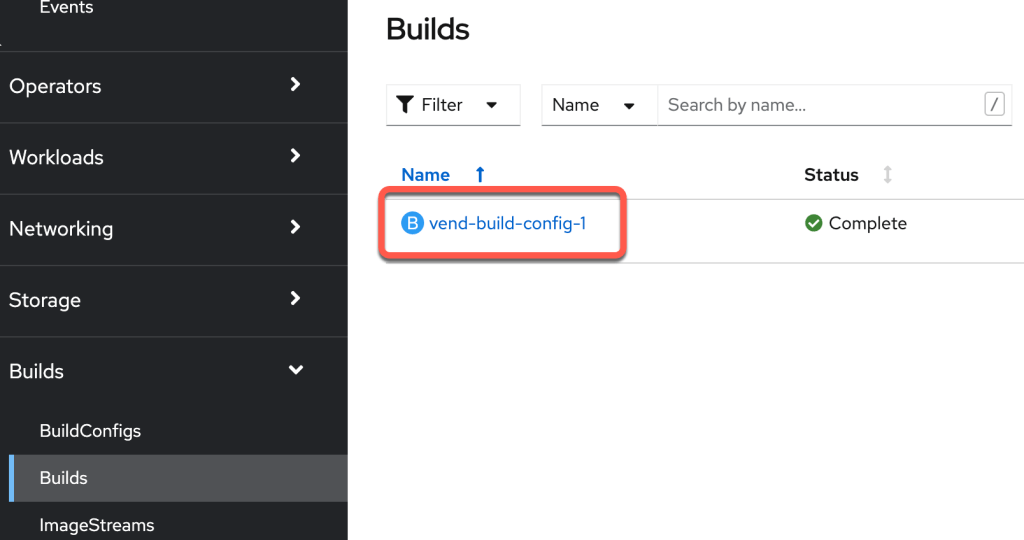
The following picture displays a build output created by a build run in the administrator perspective of OpenShift.
I created a GitHub project that contains an automation to deploy the example application to OpenShift using a bash script. In case you want to try it out by your self ;-). There are several ways to define the deployments for applications in a yaml. You can put everything in one file or create a template or there are even more other options.
I wanted to define all configuration definitions separately in different files to enhance the awareness, that these are different configurations, which are related to each other, like I showed in the overview diagram.
Sections to setup the example
We will use in this blog post an IBM Cloud Red Hat OpenShift cluster, and the IBM Cloud Shell.
- Get the example source code.
- Deploy the example application.
- Understand the major content of the bash script automation.
1. Get the example source code
Step 1:Open the IBM Cloud Shell in from your IBM Cloud Web UI
Step 2: Clone git repository
git clone https://github.com/thomassuedbroecker/vend
cd vend
Step 3: Checkout branch
git checkout -b vend-image-stream
Step 4: Open the /openshift/scripts folder
cd /openshift/scripts
2. Deploy the example application
Step 1: Get an access token and log in to OpenShift
oc login --token=[YOUR_TOKEN] --server=[YOUR_SERVER]
Note: You can follow this blog post
Log in to the an IBM Cloud Red Hat OpenShift cluster using the IBM Cloud and OpenShift CLIto do this.
Step 2: Run the bash script automation
bash deploy-application.sh
STEP 3: Verify the vend application output in the browser
Get the route URL and open the route URL in a browser
oc get route | grep "vend"
STEP 4: Verify the output in your browser
Now open the route and verify the output in your browser:
"{\"message\":\"vend test - vend-image-stream-demo-openshift\"}"
STEP 5: Verify the vend application log file output, that’s saved in the persistant volume claim.
- Get the running pod
oc get pods | grep "vend"
Example output:
vend-6879fc49cc-fv72d 1/1 Running 0 3d3h
- Access the running pod on it’s command line
oc exec vend-6879fc49cc-fv72d cat ./logs/log.txt
Example output:
kubectl exec [POD] [COMMAND] is DEPRECATED and will be removed in a future version. Use kubectl exec [POD] -- [COMMAND] instead.
*** INF0: 2021-11-7 (XX:XX:30) [1636XXX130402] VEND_USAGE : vend-demo-secret-openshift
*** INF0: 2021-11-7 (XX:XX:30) [1636XXX30403] USER : user
*** INF0: 2021-11-7 (XX:XX:30) [1636XXX30403] USER_PASSWORD : user
*** INF0: 2021-11-7 (XX:XX:30) [1636XXX30403] ADMINUSER : admin
*** INF0: 2021-11-7 (XX:XX:30) [1636XXX0403] ADMINUSER_PASSWORD : admin
*** INF0: 2021-11-7 (XX:XX:30) [1636XXX0407] Info - envDefined==false
*** INF0: 2021-11-7 (XX:XX:30) [1636XXX1906] VEND_USAGE : vend-image-stream-demo-openshift
3. Understand the major content of the bash script automation
In this section we are going to understand the major steps and the major commands inside the script.
Therefore it’s also good to get a basic understanding of the example application. The application provides several endpoints and write logs.
With this in mind, the application needs following environment variables and mountpoints when you want to run it locally.
Here you see the Docker run command I use in a bash script to start the example application locally.
docker run --name=$CONTAINER_NAME \
           -it \
           --mount type=bind,source="$(pwd)"/accesscodes,target=/usr/src/app/accesscodes \
           --mount type=bind,source="$(pwd)"/logs,target=/usr/src/app/logs \
           -e VEND_USAGE="demo" \
           -e USER="user" \
           -e USERPASSWORD="user" \
           -e ADMINUSER="admin" \
           -e ADMINUSERPASSWORD="admin" \
           -p 3000:3000 \
           $IMAGE_NAME
Keep this in mind when we are going to inspect the different deployment configurations for this example application.
The steps are related to the bash script automation:
- Create a project in OpenShift
- Create secrets
- Create a configmap
- Define build-config, image-stream and run build
- Create a deployment
- Create a service
- Create a route
Step 1: Create a project in OpenShift
oc new-project "$OS_PROJECT"
Step 2: Create secrets
The secrets are for the user data in the application.
oc apply -f "${root_folder}/openshift/config/secrets/secrets-config.yaml"
- Configuration template:
FYI: Opaque: Indicates the structure for the secrets key names and values.
apiVersion: v1
kind: Secret
metadata:
  name: vend-secrets
type: Opaque
stringData:
  username: user
  userpassword: user
  admin: admin
  adminpassword: admin
Step 3: Create a configmap
The configmap only contains one value for our example application to display the usage context of the application.
oc apply -f "${root_folder}/openshift/config/configmaps/configmap.yaml
- Configuration template:
kind: ConfigMap
apiVersion: v1
metadata:
  name: vend-config
data:
  VEND_USAGE: "vend-image-stream-demo-openshift"
Step 4: Define build-config, image-stream and run build
- Define imagestream
oc apply -f "${root_folder}/openshift/config/image-streams/$IMAGESTREAM_CONFIG_FILE"
- Configuration template:
kind: ImageStream
apiVersion: image.openshift.io/v1
metadata:
  annotations:
    description: Keeps track of changes in the image.
  name: IMAGE_STREAM_1
- Define build config
oc apply -f "${root_folder}/openshift/config/build-config/$BUILD_CONFIG_FILE"
The build config contains the information about the image stream. Here we do replace GIT_REPO_1 with the link to the GitHub project, where we get the Dockerfile and source code. The IMAGE_STREAM_1 will be replaced with the image url to the container image inside the OpenShift container registry.
apiVersion: build.openshift.io/v1
kind: BuildConfig
metadata:
  name: vend-build-config
  labels:
    app: vend-app
spec:
  nodeSelector: null
  successfulBuildsHistoryLimit: 5
  failedBuildsHistoryLimit: 5
  runPolicy: Serial
  source:
    type: Git
    git:
      uri: 'GIT_REPO_1'
      ref: vend-image-stream
    contextDir: /
  strategy:
    type: Docker
    dockerStrategy:
      dockerfilePath: Dockerfile
  output:
    to:
      kind: ImageStreamTag
      name: IMAGE_STREAM_1:latest
  triggers:
    - type: Generic
      generic:
        secretReference:
          name: vend-generic-webhook-secret
    - type: GitHub
      github:
        secretReference:
          name: vend-github-webhook-secret
- Start build
oc start-build $OS_BUILD
- Verify the log during the build
oc logs
- Extract the image container registry from the image-stream
We need later the information of the concrete image location for our deployment. So we create a tmp JSON file with the needed information and then we extract the information from the JSON.
Here are example values which will be used during the bash script execution.
DOCKERIMAGEREFERENCE=image-registry.openshift-image-registry.svc:5000/vend-image-stream/vend-image-streamTAG=v1
  oc get imagestream "$OS_IMAGE_STREAM" -o json > ${root_folder}/openshift/config/image-streams/$IMAGESTREAM_JSON
  DOCKERIMAGEREFERENCE=$(cat ${root_folder}/openshift/config/image-streams/$IMAGESTREAM_JSON | jq '.status.dockerImageRepository' | sed 's/"//g')
  TAG=$(cat ${root_folder}/openshift/config/image-streams/$IMAGESTREAM_JSON | jq '.status.tags[].tag' | sed 's/"//g')
  IMAGESTREAM_DOCKERIMAGEREFERENCE=$DOCKERIMAGEREFERENCE:$TAG
  echo "-> image reference : $IMAGESTREAM_DOCKERIMAGEREFERENCE"
Step 5: Create a deployment
In the following extract of the bash script you see how we replace variables in our template file and write the changes to a new file we will use in the oc apply command.
  echo "-> prepare deployment config"
  KEY_TO_REPLACE=CONTAINER_IMAGE_1
  echo "-> image: $IMAGESTREAM_DOCKERIMAGEREFERENCE"
  sed "s+$KEY_TO_REPLACE+$IMAGESTREAM_DOCKERIMAGEREFERENCE+g" "${root_folder}/openshift/config/deployments/$TEMPLATE_DEPLOYMENT_CONFIG_FILE" > ${root_folder}/openshift/config/deployments/$DEPOLYMENT_CONFIG_FILE

  echo "-> create deployment config"
  oc apply -f "${root_folder}/openshift/config/deployments/$DEPOLYMENT_CONFIG_FILE"
- Configuration template:
The variable CONTAINER_IMAGE_1 will be replaced with the exact container image url.
Example value:
image-registry.openshift-image-registry.svc:5000/vend-image-stream/vend-image-stream:latest, that value will be provided by the variable$IMAGESTREAM_DOCKERIMAGEREFERENCE.
kind: Deployment
apiVersion: apps/v1
metadata:
  name: vend-deployment
  labels:
      app: vend-app
spec:
  selector:
    matchLabels:
      app: vend
  replicas: 1
  template:
    metadata:
      labels:
        app: vend
        version: v1
    spec:
      volumes:
      - name: vend-volume-accesscodes
        persistentVolumeClaim:
          claimName: vend-pvc-accesscodes
      - name: vend-volume-logs
        persistentVolumeClaim:
          claimName: vend-pvc-logs
      containers:
      - name: vend
        image: CONTAINER_IMAGE_1
        livenessProbe:
          exec:
            command: ["sh", "-c", "curl http://localhost:3000/"]
          initialDelaySeconds: 20
        readinessProbe:
          exec:
            command: ["sh", "-c", "curl http://localhost:3000/health"]
          initialDelaySeconds: 40
        env:
        - name: VEND_USAGE
          valueFrom:
            configMapKeyRef:
              name: vend-config
              key: VEND_USAGE
        - name: USER
          valueFrom:
            secretKeyRef:
              name: vend-secrets
              key: username
        - name: USERPASSWORD
          valueFrom:
            secretKeyRef:
              name: vend-secrets
              key: userpassword
        - name: ADMINUSER
          valueFrom:
            secretKeyRef:
              name: vend-secrets
              key: adminuser
        - name: ADMINUSERPASSWORD
          valueFrom:
            secretKeyRef:
              name: vend-secrets
              key: adminpassword
        volumeMounts:
          - mountPath: /usr/src/app/accesscodes
            name: vend-volume-accesscodes
          - mountPath: /usr/src/app/logs
            name: vend-volume-logs
        ports:
        - containerPort: 3000
      restartPolicy: Always
Step 6: Create a service
oc apply -f "${root_folder}/openshift/config/services/service-config.yaml"
- Configuration template:
kind: Service
apiVersion: v1
metadata:
  name: vend-service
  labels:
    app: vend-app
spec:
  selector:
    app: vend
  ports:
    - port: 3000
      name: http
  type: NodePort
Step 7: Create a route
When we would use the oc srv [SERVICE_NAME] command to expose the route, the URL for the route would be like: [SERVICE_NAME].[PROJECT_NAME].[OC_DOMAIN_1] maybe that could be to long for us.
That’s the reason why we want to shorten the name of the route, so we need to get the domain of the OpenShift ingress configuration (OC_DOMAIN_1 in our case) for the cluster. Then we map the route to the service, and the service points to our pod where our example application runs.
This is how we do define our route url:
[APPLICATION_NAME].[OC_DOMAIN_1]
- Get host domain
OS_DOMAIN=$(oc get ingresses.config/cluster -o jsonpath={.spec.domain})
- Apply the configuration:
oc apply -f "${root_folder}/openshift/deployments/routes/$FRONTEND_ROUTE_CONFIGE_FILE"
- Configuration template:
apiVersion: route.openshift.io/v1
kind: Route
metadata:
  name: vend-route
spec:
  host: vend.OC_DOMAIN_1
  port:
    targetPort: 8080
  to:
    kind: Service
    name: OC_SERVICE_1
Summary
It could be useful to use the internal container registry of OpenShift. It is helpful to get a basic understanding of build config, build and image stream. In that combination it also good to know, what are the configuration dependencies related to run your containerized application.
I hope this was useful for you and let’s see what’s next?
Greetings,
Thomas
#ibmcloud, #container, #roks, #containerregistry, #openshift

The Image Registry may be disabled by default on ROKS, resulting in the following event message in the `Build` object when trying to build the application:
“Error starting build: an image stream cannot be used as build output because the integrated container image registry is not configured”
You can check if that is the case with the following command:
oc get configs.imageregistry.operator.openshift.io cluster -o jsonpath={.spec.managementState}
If the answer is “Removed”, run the following command to enable it:
oc patch configs.imageregistry.operator.openshift.io cluster –patch ‘{“spec”:{“managementState”: “Managed”}}’ –type merge \
&& oc wait configs.imageregistry.operator.openshift.io cluster –for=condition=Available=True –timeout 120s
Then delete the BuildConfig and ImageStream resources created before enabling the registry and try again.
LikeLiked by 1 person
Thanks
LikeLike